Monday, September 22, 2014

Progress on stitch along dragon

Previous Post on Dragon stitch along

Stitching progress

I'm really enjoying this stitch along. Bayeux stitch is one of those things that I've been meaning to do for quite some time. I think the hardest part of this project is staying patient with stitching progress. Fortunately, we had an SCA demo this weekend and I got a nice chunk of time to get some stitching in.

Stitching progress

The outlining stitches always make such a difference! They are enormously satisfying, since you can begin to see the project really take shape. Stitch on!

Saturday, September 20, 2014

Stitch along dragon

I'm a huge fan of the blog Opus Anglicanum. I really love her both her design work and her stitching. So, when she put together a stitch along for a Bayeux stitch dragon, I just couldn't resist. If you are interested, the materials kit is in this post and the stitch-along starts here.

Building a template

I started my project off by trying a new design transfer method - quilter's mesh. I picked some up recently at a clearance store for very cheap and it seems like a neat option. Here is the mesh and the dragon template I downloaded.

Traced template

I traced the template using a Sharpie permanent marker and it traced pretty easily.

The mesh template

Here is what the mesh looks like with our cute little dragon drawn on.

Transferring the design

I have a nice Micron pen that I use for embroidery, but the tip is small and too stiff to work well with the mesh. The mesh holes have just enough depth to snag the pen tip a little, over and over. Instead I went with the Sharpie felt tip and it worked really well. When you lift the mesh up, you get a nice little dotted line to trace.

Design with the lines filled in

Here is the design with all the dots connected and the lines smoothed out a bit. My little dragon is ready for stitching!

Wednesday, September 17, 2014

Laurel's Prize Tournament

In Ansteorra, the Laurel's Prize Tournament isn't really a tournament. It's more of a mentored art show. Participants set up displays of their art for the event and then hang around to chat and demonstrate their craft. You pre-register for the event and the coordinators schedule several Laurel's who best match your area and goals to come by and visit you. It's a lovely, high energy event that has people exchanging technique, research, and general project planning. I like to call it the shiny, happy nerd fest. It's a very popular event for a lot of good reasons - it's fun for everyone. It's also very tiring since the whole day is busy.

Mistress Amata was kind enough to take a picture of my display this year. I brought Giant Sparkly Banner, the populace banners, one of the mouse hats, the German brickwork bag I am working on, and a few sundry fiber arts bits. I also brought my research binders and got some excellent feedback on them. I finished up my new dark blue dress and light blue under dress for the event, which I am wearing in the picture.

I took quite a few photos this year, but my camera is dying so many of them didn't turn out well. I did manage to get some good pictures and they are posted on Flickr in this album: https://www.flickr.com/photos/helene83/sets/72157647188468460/

Tuesday, September 9, 2014

Brick stitch pouch

stitch sample

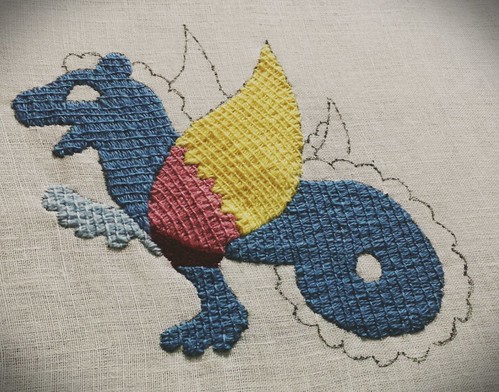
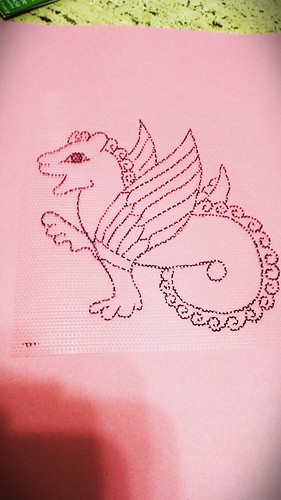
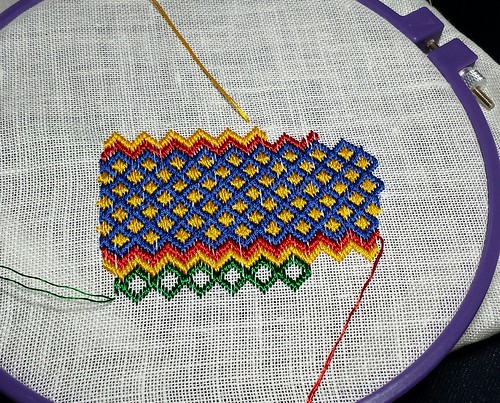
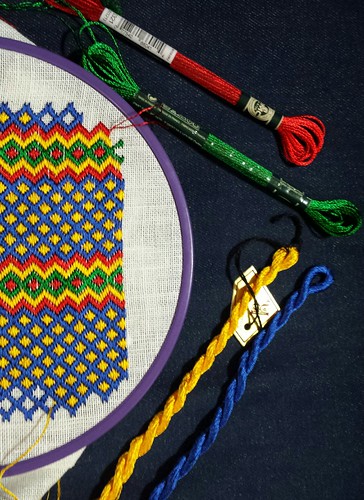
Sometimes I post pictures to my Flickr feed with all intents to write about them - and then forget. Such is the fate of the brick stitch pouch that I am currently working on, so we will take a quick trip back in time. This project started out as a quick doodle to test out some new fibers that I picked up at the local embroidery store. Having recently played around with some filament silk, I was looking for something that was a cheaper approximation of that pretty high shine and that soft hand. DMC has recently changed their rayon line again, so I pick up some DMC red and green. The Reaissance Designs "Silky" threads were another synthetic option that was just so shiny and soft that I had to get a couple of skeins in blue and yellow.

stitching threads

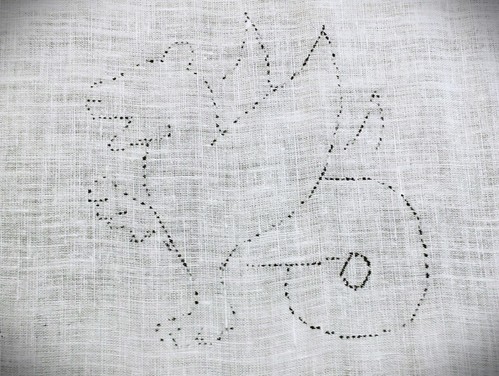
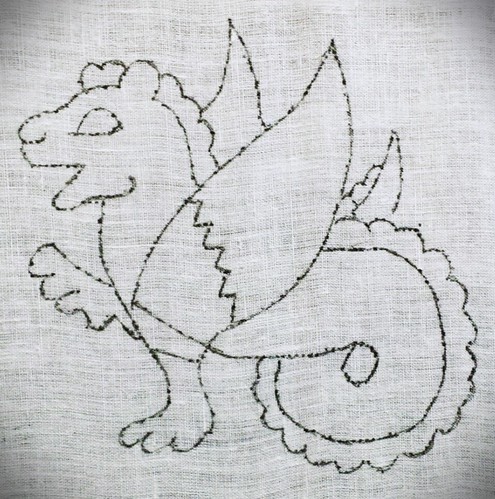
I started stitching this little doodle using an impromptu brick stitch pattern and was really having fun with it. It just kept getting bigger!

The DMC rayon is in a very familiar skein, that are individually wrapped in a plastic tube. The rayon is very slippery and easily separates into six strands. Each strand barely has any twist at all and reminds me in feel and look of flat silks. I used two strands for the stitching on the 28 count linen, but I think that next time I would use three. The fibers are finicky like silk, so got find your hand lotion and check your cuticles. I love the feel of stitching with this rayon and really, really love it bright shine. I do not like the feeling of starting, finishing, or tying off knots with this thread because it fights back and seems to leave you with the feeling that the second you turn your back it's going to spring out of place. After finishing the stitching however, the piece feels very solid and I don't have anything wiggling out the back. The threads do snag, so you have to be careful with your hands and environment. They can also tire easily, so shorter lengths are better or you get fuzzy parts. Overall, the red and green are beautiful and shiny and soft, and I think they are a good option for that silky look.

The Renaissance Designs "Silky" comes in a lovely twisted skein and also separates out into smaller threads. These threads seem more solid than the DMC threads and were much less likely to fuzz or snag. They had the same springiness that made starting, finishing, and tying threads a bit unnerving. Two strands of the blue and yellow provided really good coverage on the linen, but they seem to have more texture and less shine. Some of the texture comes from the threads having a bit of a twist, so if you are looking for that twist this thread is a good option.

stitching progress

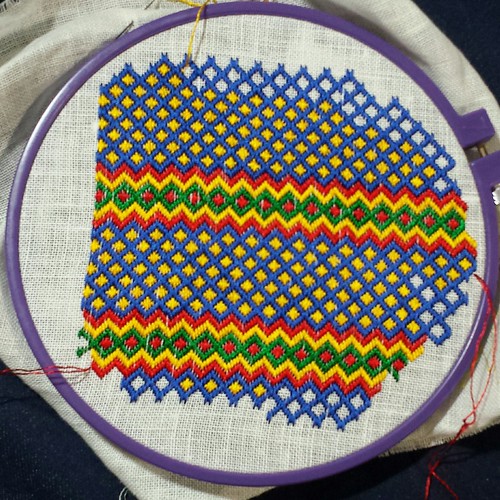
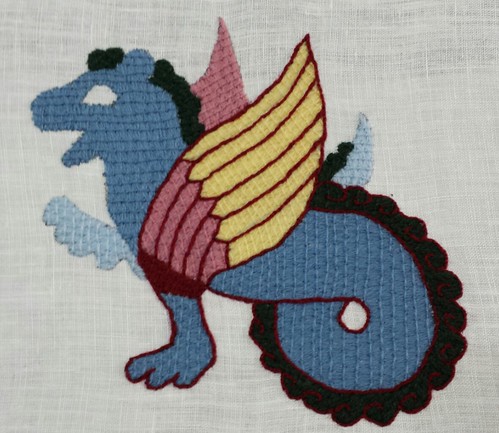
At this point, it was clearly a "Project that Must be Finished" and so I had to figure out what it was going to be. (to be continued)

Tuesday, September 2, 2014

Generally busy

I'm juggling a number of projects with a variety of goals and the last couple of weeks have been a bit of progress on everything.

IMG_0812

Here I am modeling the latest in my armor. My leg armor is coming along and is in a wearable state, although it still needs more work to be truly finished. I also have a new helm from Master Max and a new aventail that Sir Ysfael hung for me. After a long hiatus, I am finally back in the fight.

Six pair of hanger loops starched and ready to sew onto the populace banners

Here are six pairs of little hanger loops ready for the assembly line as I attempt to finish up the populace banners.

Populace banners with attached hanging loops!

Three banners finished stitching with hanger loops attached! I'm currently finishing up the last one and then I will have two full sets of three. Next I need to come up with a hanging pole arrangement that is slightly nicer than the yardstick I had hanging around the sewing area.

Surcoat for fighting

I knocked out a quick linen fighting surcoat for a friend. It's another project in my continued theme of reducing the fabric stash.

Preview of latest outfit.  It still needs some more sewing.

And last, but not least, I have a preview of my next outfit. The dress and under dress are assembled but still need finishing on the neckline and hem. It's kind of hard to see in the picture, but the dress is dark blue, the under dress is light blue, and the eyelets+lacing are in light green.