Showing posts with label surcoat. Show all posts

Tuesday, March 24, 2015

Giant Sparkly Banner Goes to Gulf War


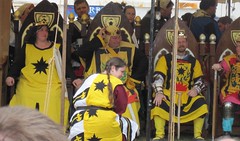
Here is Giant Sparkly Banner in the Opening Processional at Gulf Wars this year.  Incidentally, I am on the left holding the banner and wearing my spiffy surcoat and matching hat!  Look at all those pretty surcoats!

The picture above is linked directly to the picture, so here is the proper link for the photographer:
https://www.facebook.com/photo.php?fbid=959521277421699&l=6c5d73f50c

Wednesday, March 11, 2015

Finished (for now)

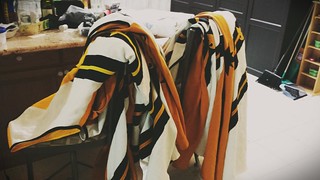
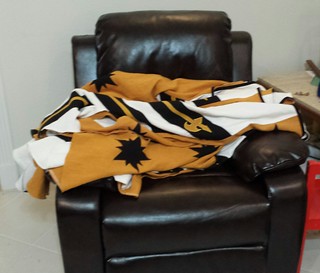
Stack of finished surcoatsFirst batch of finished surcoats

The pre-Gulf Wars surcoat assembly crunch is finished!  Sunday night we finished 9 more surcoats and then 2 more on Monday.  Last night I was able to deliver most of them to their proud new owners and there was some surcoat silliness at fighter practice.    That brings our total to 17 complete!  We have 3 more that didn't have a deadline, so they will be put to the side until after the event.  The workspace looks so empty now! I have a new camera, so there will be some action pictures and a couple of group shots to show off our new awesome colors!  Now to finish packing...

Friday, February 20, 2015

The Prodigal Surcoat is Clean!

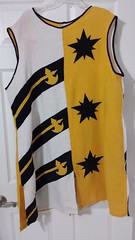
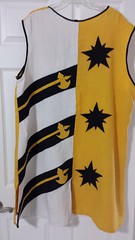
Repaired surcoat frontRepaired surcoat back

After numerous repairs and lots of cleaning, the prodigal surcoat is looking mighty fine!  I returned it this Tuesday to our War Company commander, who promptly took it back into action for melee night.  I totally forgot to take a picture of it in action.  I got some "oooohs" and "ahhhs" from folks who had seen the poor thing in it's original state.  I am quite pleased with this project - an easy win in terms of getting surcoats of the project rack and a nice affirmation for quality control :)

Monday, February 16, 2015

Repairing the Prodigal Surcoat

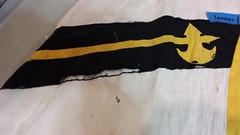
Sad stripes
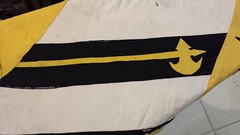
 My first task was applique repair. Here is a good example of a stripe that needed help. The linen has disintegrated in bits and the applique is peeling up. Some of the stitching has pulled loose. It is a very sad little halberd stripe.

Stitched up stripes
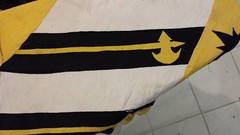
 First, I ironed down the stripes and even sneaked a little bit of Wonder Under in bits that were completely pulled off. I stitched the stripe back down on the edges and added some darning stitches to keep ruffled bits tacked down. After lots of darning stitches and some more ironing, it's starting to look much better. There are still some little naked white spots where the black fabric is gone.

Finished stripes

Here is where I must confess that I pulled out the Sharpie laundry marker in black and just fixed the problem with a marker. It looks much better now though.  I went through and fixed all the other applique bits and most of them were much easier that this stripe.  There were a few spots where yellow fabric was gone so I had to do some extra darning and extend the applique stitch line into the halberds.  

Once the applique was all fixed, I then started patching holes.  I still have fabric left over that matches the original, so I had plenty for tiny patch pieces.  There were a lot of holes that needed mending.  After finishing all the holes that were big enough to require patches, I put the surcoat in for a good soak for some stain removal.

  Soaking out the stains

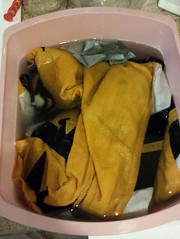
This is the surcoat after soaking for 6 hours in oxyclean.  The water is really, really gross.  I threw in a dye catcher to try to get some of the dinge out and hopefully pick up some of the armor grunge and leather dye.  The dye catcher worked surprisingly well and is the dark gray blob at the top of the bucket.  That dark gray absorbed a lot of color floating around in the dirty water.

Saturday, February 14, 2015

The Prodigal Surcoat

On the morning of the first great sewing day, I was starting to get a little nervous.  We were making a lot of surcoats for a lot of people and I was beginning to sweat the details.  But then, a little SCA magic happened....

My first batch of surcoats was made with my friends Rachel and Blaise.  I wore my surcoat at that Bordermarch Autumn Melees (BAM) and Gulf Wars.  Here is a picture of it all nice and relatively unscathed.
IMG_0410

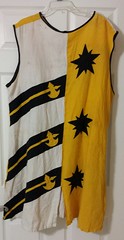
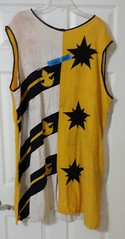
That's me in the court of King Owen and Queen Genevria at Gulf Wars.  Anyway, I wasn't going to BAM the next year, so I loaned out my surcoat to a friend.  As I missed more and more melee events, I kept getting asked by various people to borrow the surcoat and it got passed around.  At some point, we lost track of who had it and I had written it off to the sands of antiquity.  So, the morning of sewing day, Ionnes walks through the door and asks if he could add surcoat repair to the queue.  He has this scruffy looking surcoat that needs repair (front on left, back on right).
Front of surcoat before repairBack of surcoat before repair

The first thing several people say is "wash it first," but he had!  We dampened it and ran it through the drier.  We ironed it without mercy.  The pictures above show our improved results.  It's still pretty scruffy.

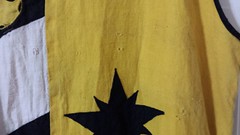
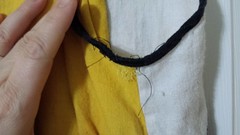
 The stripes are falling off and a bit shredded.  There are tiny wear and tear holes scattered all over.  These little holes are pretty normal and familiar for the chivalric combat folks.  The neck and arms holes are in need of some help.
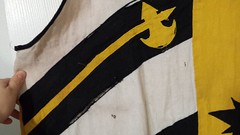
Wear and tearWear and tearEdge wearEdge wear

The construction of this surcoat is looking pretty familiar, so I look inside and there is a little mark in the front.  This is my prodigal surcoat - returned home!  Some laughing and a bit of discussion gave it some history.  It's attended five years of melee events since it left me!

So now this scruffy coat has some perspective and it is in pretty good shape for five years of melees.  The stitching has held up surprisingly well.  The star applique is in very good shape and needs minimal maintenance.  The stripes need serious repair.  They are not just peeling off at the edges, the linen is disintegrated in some bits.  The tiny little holes will need darning where they are getting big.

The most surprising thing I've learned is that "decorative" bias tape on the neck and arm holes is actually reinforcing those seams - and in some places is holding it together where the fabric has shredded.  Now I know why we use that approach.  We made our own linen bias tape and it still looks good and has worn really well.  I think that it was worth the effort and probably extended the life of this garmet for at least a couple of years.

So, now I can say with some confidence that this little workshop makes some quality fighting gear :)