Showing posts with label lucet. Show all posts

Sunday, March 23, 2014

Giant Sparkly Banner on Tour

KingdomAnS-109

KingdomAnS-110

Giant Sparkly Banner made a trip to Kingdom A&S and to Bryn Gwlad A&S competitions. Above are pictures of it in action. Below is a picture of the banner completed getting ready to go traveling.

banner

My display used two trays: one for materials and one for technique. The materials tray contained my tools including scissors, needles (in the needlebook), and a laying tool. I made skeins with the threads I used in the green, the passing gold, and the gold twist. Finally, I included a sample of the gold twist lucet cord, which I stored on a thread winder.

tray 2

The second tray displayed the various steps for the embroidery. The two fill patters were embroidered in a series of steps

  1. Foundation: The foundation layer is the white interface foundation which was cut to design and ironed on the brocade. In the sample the white layer is shown at either end of the swatch.
  2. Laid green stitching: The green threads were laid down for full coverage of the foundation. The stitch length for the green thread is much longer than most embroidery stitches because it will be couched down later. You can see in the picture that the green thread drifts and wiggles where there are no layers above it.
  3. Laid gold stitching: The next layer was gold passing thread embroidered in laid work pattern, which was on top of the green embroidery. The letters were embroidered in open laid work using a grid pattern. The leaves of the wreath was patterned after Gabriel's wings from an alter frontal so the only laid work was the single gold twist thread along the center. The top half of the sample shows the laid gold threads before they are couched. There is still some shifting of the gold and green threads and the sheen is at a uniform angle.
  4. Couching:After the laid work is finished, the gold pattern (grid or wing/leaf) was couched down. For the grid pattern on the letters, each intersection is couched with a single stitch of gold passing thread. For the wing pattern on the leaves of the wreath, the center gold twist is couched with a longer stitch at an acute angle. The leaves have fewer couching stitches, but the stitches are longer and cover more of the green thread. The bottom half of the stitching in the sample shows the grid with the intersection couched down. The couched intersection gives the work a more dimensional look which adds more sparkle. On the far right end of the swatch you can see the grid couched down without the green layer, to show the couching stitches more clearly.
  5. Outline: The final step for each embroidered motif was to add an outline of couched gold twist. The sample shows the gold twist couched on the bottom of the foundation layer. On the right side of the swatch, the end of the twist has been plunged (pulled through the brocade) as is normally done on finished embroidery. This is a good example of why the foundation and brocade combination work so well. The foundation provides stability for the couching stitches, which the looser weave of the brocade allows the much thicker gold twist to be pulled through to the back without creating tears or runs in the weave. The left side of the swatch shows the gold twist left loose on the top, which is what it looks like while it is being couched. You can immediately see that the biggest challenge here is holding the thread in place for stitching, while trying to keep the twist and prevent fraying of the top threads.

tray 1

Thursday, March 13, 2014

Lucet cord edging

I finished the Giant Sparkly Banner a while back, but still need to finish posting progress pictures. Here's a short summary of how I finished the edges using lucet cord. First I prepared the seam by turning in the edges, pinning them, and ironing them flat. Here is a picture of the stitching in progress so that you can see the front layer (the yellow brocade), the back layer (the blue linen), and the gold lucet cord.

Use the first stitch to pick of both pieces of fabric along the folded edges.

The second stitch then goes throughout the middle of the lucet cord. When you pull tight it will close the seam with the cord on top.

I stitched the edges closed with my gold Gutterman thread and they edges look very nice. It's a very simple medieval period technique to decorate edge seams.

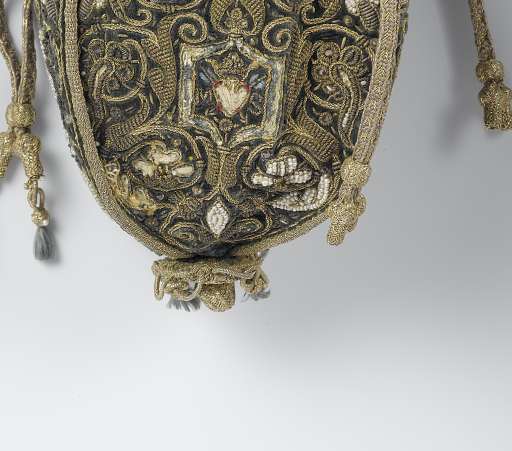
Above is an example of a pouch with braids along for seam finishing. The braids on this one look like finger loop braiding. Dutch circa 1617/1622

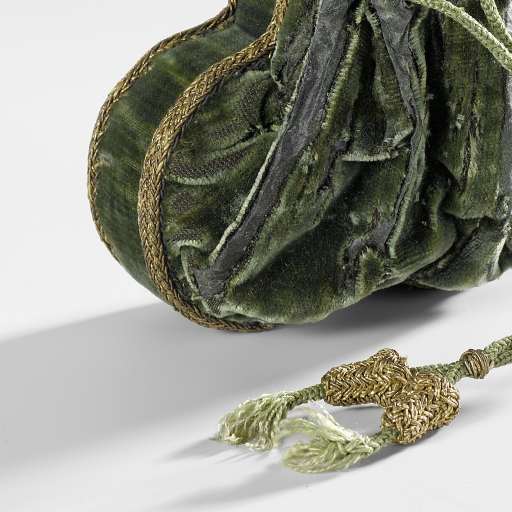
Above is another good example - Dutch?/Italian? cir cal 1580+

Lucet all the things!

I've been playing around with various new threads and my lucet. I've been looking for good options for the silk look without spending quite so much money. First up is a bamboo and silk blend from Patons. It handles and feels like a quality spun silk. I really liked it.

Paton's metallic is definitely a modern looking yarn that looks kind of like the fabric that jerseys are made of. It lucets up fairly easily and looks very nice. It definitely has a higher screen than the spun silk, so it's a little closer than the look of filament silk. It's a bit slubby, but doesn't look bad.

Next up is plain old DMC perl cotton, but I was testing out a two strand technique. The technique runs the slip nots for each color on either prong of the lucet. The method creates a twist between the colors. The resulting cord has four side: a purple side, a yellow side, and two sides that have the mixed colors. It's rather fetching.

Sunday, January 12, 2014

Cloak and Hood

Now that I've got my sewing area a bit more functional, I've been working on a cloak and hood for my friend Rachel. This is another project off a to-do list that we made about 4 years ago, but hey, who's counting? Here is a picture of her modeling progress. I've gotten all the sewing done except the hem on the cloak! Hooray! Below is Rachel modeling her cloak with her best goofy face.

Rachel models cloak progress

The cloak and hood are made out of gray and blue cotton flannel for extra warmth. This is the first cloak I've made where the drape is really good and the lining doesn't sag. Acheivement unlocked! This is my first hood and I like it. Now that the sewing is done, I've started with the decoration. We had a demo last night and Giant Sparkly banner was on display... so I had a handy excuse to start other handwork! Ha!

cloak progress

I may have gone a little nuts with the lucet a while back, since I like to answer questions like "What does a skein of yarn look like luceted?" The answer is shown above. I am stitching the lucet cord over the seams and it squares things up very nicely. The trim actually seems to be making the dagging more well-behaved, which is a pleasant surprise. I know in my brain that adding decorations always really changes a project, but the picture above really demonstrates how wonderful that change is! I am loving the lucet cord trim - Thanks to Elen for the great idea :)

Thursday, November 28, 2013

Fun!

Handwerkmeister

I took my children's "mouse battle" hats to the Jagermeister event this weekend at Ffynnon Gath and I won the A&S competition! Wow! Above is my lovely scroll which was painted by Grishka. I had a great time at the event and received a lovely gift basket that included a gorgeous lucet!

New lucet

I've been fiddling around with the lucet and now that I've got the hang of it there is a string pile starting to accumulate. It's the perfect nervous fiddle for truly lazy days! I also thought I'd post a picture so that you would know that I haven't forgotten the giant sparkly banner. Most of the update pictures have been more of the same, so I haven't written much about them, but today's is a happy update - I am almost finished with the letter fill! Yes, that really is the last two letters of "Society for Creative Anachronism"

Giant sparkly banner