Showing posts with label silk. Show all posts

Wednesday, November 11, 2015

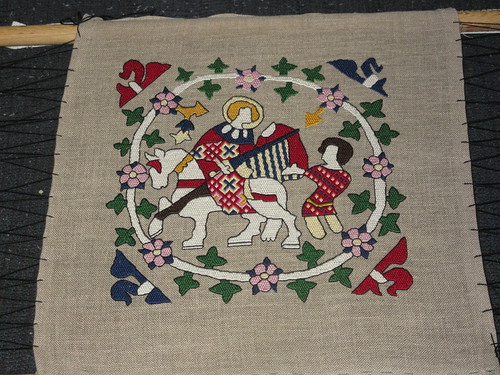
St Martin Panel

IMG_0737 

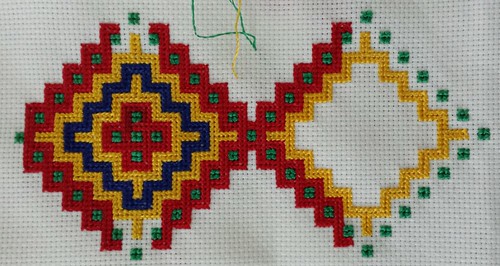
Look at what I found! I have picked up the St Martin's panel again and this time I intend to finish it!
Thursday, October 29, 2015

Tuesday, October 27, 2015

Royal gloves - sewing things up

20150919_192559

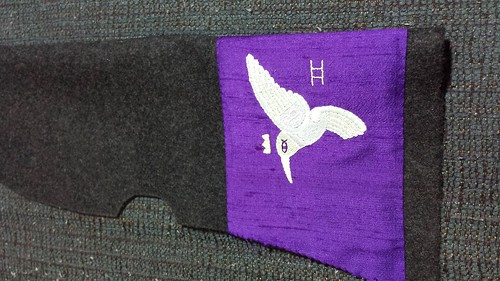
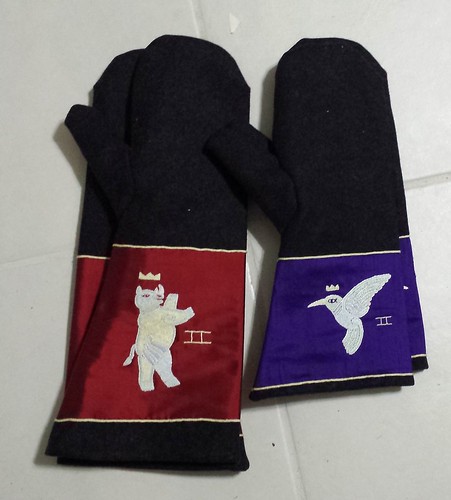
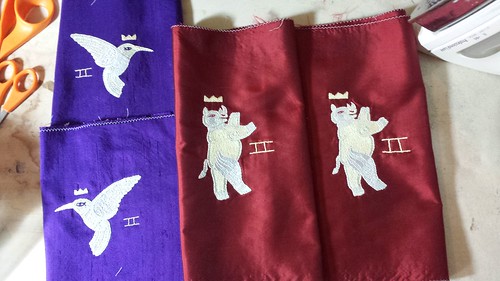
And finally I had this lovely pile of embroidery.  We are going to pretend that both of the hummingbirds are facing the correct direction and proceed accordingly.  Next we are going to sew the embroidery to the pieces of our gloves.  The gloves here are actually mittens, because we are Vikings!

  20150927_124246

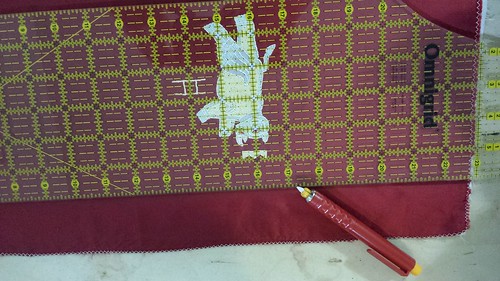
I just love my quilter's tools.  Here I am using my block ruler and chalk pencil to get all the lines perfect.

20150927_131503

And now I've ironed in my the folds for the embroidery piece.  I used an ultra-lightweigh fusible called Misty Fuse.  The fusible itself is like gossamer and floats on the air.  It's good to tack things down and doesn't add stiffness to the piece.  It's not so great if you have the ceiling fan on.  I wouldn't use it without extra stitching though.  I also have my trusty block ruler to line things up just right.

  20150924_213102

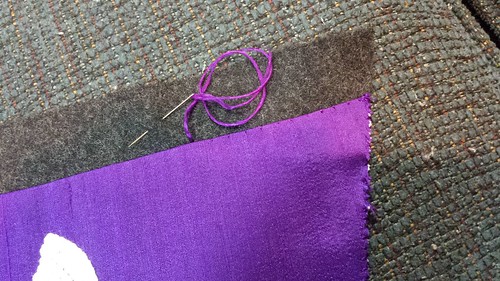
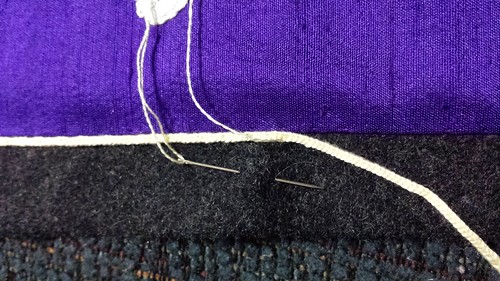
 I pulled enough silk from the ground fabric to use it for stitching down the embroidery. Here are the teeny tiny stitches on the fold. 20150925_191654

And here is the embroidery all sewn down to my glove piece.  Can we make it prettier?  Yes!

20150925_204238

I used the light yellow silk to lucet up some cording for a matching trim.  Then I used the same silk to stitch down the tiny trim over our seam edge.

20150925_205931

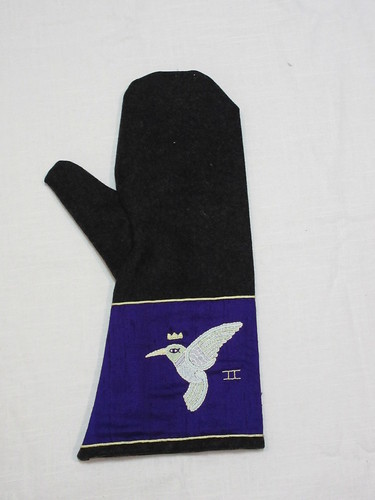
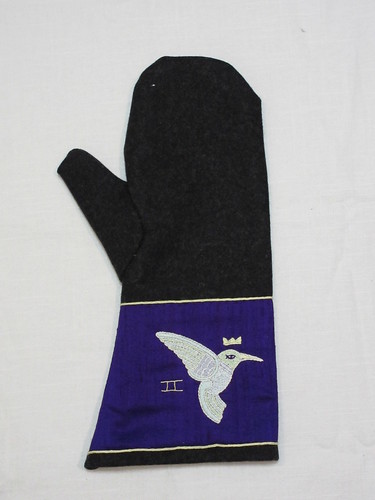
And here is one finished cuff ready to be sewn into a finished mitten!

Royal Gloves - Rhino

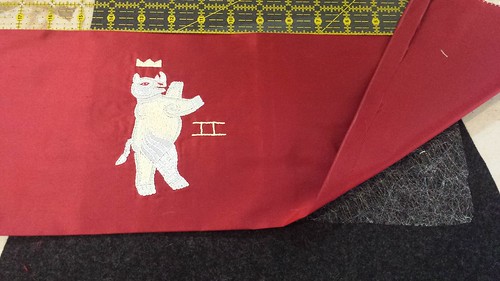
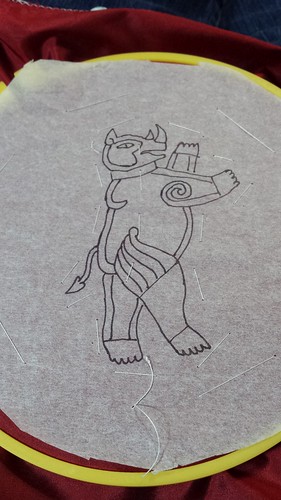
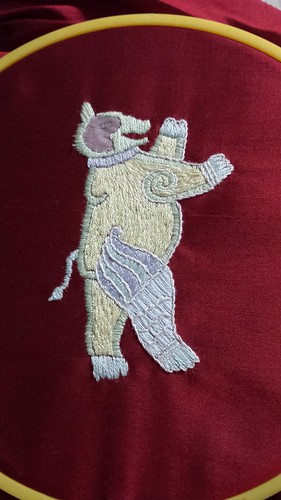
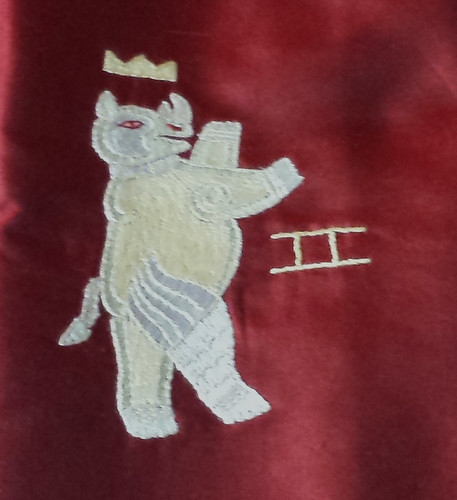
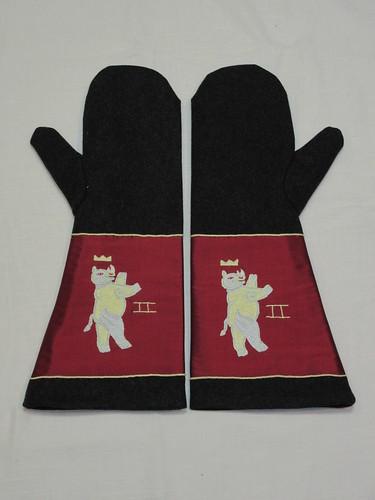
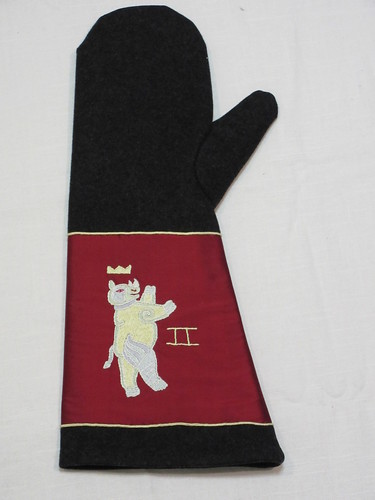
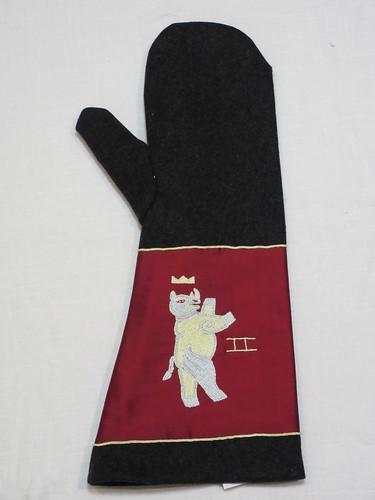
Sven's heraldry is a rhino, which was an interesting design challenge.  It's difficult to make larger creatures in the Viking aesthetic and have them still look "cool" to the modern eye.  After a large number of drafts I finally was happy with this guy.  The rhino was bigger and had fewer smooth lines than the hummingbird, so I went with a tissue paper template for the stitching pattern.  Here's the template basted onto the gorgeous red silk.
20150910_220315

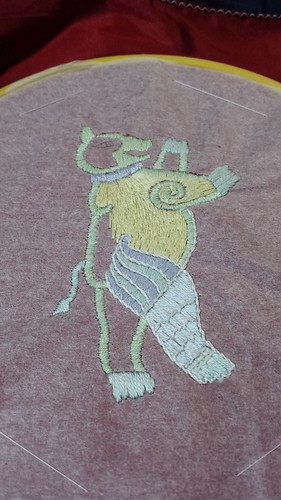
I don't like the tissue paper, so it took enormous self control to leave it on while I stitched.  Here's some stitching progress on my rhino.  The color palette and thread are the same set as the hummingbird.
20150907_201602

Finally, I was far enough along to pull off the tissue paper!

20150907_202545

Nearly done....
20150908_194616

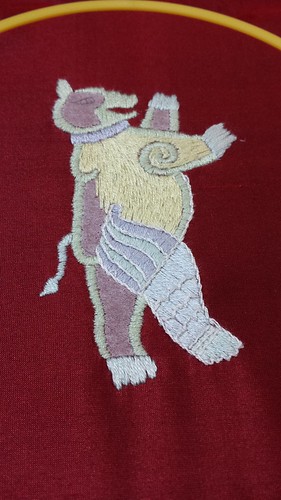
And here is a slightly fuzzy picture of the completed rhino
20150919_192553-b

Friday, October 23, 2015

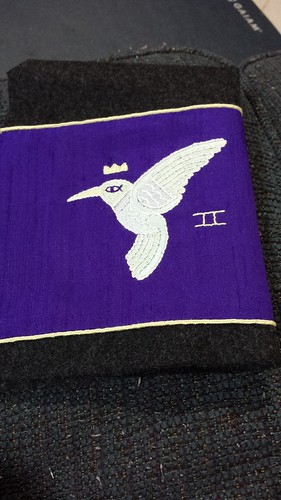
Royal Gloves - hummingbird

My commission for gloves for the Royals of Ansteorra has been delivered, so now I can post my pretty pictures!  The gloves were for Sven II and Antigone II and were given in court a couple of weeks ago.

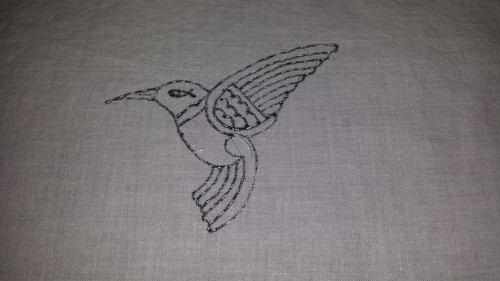
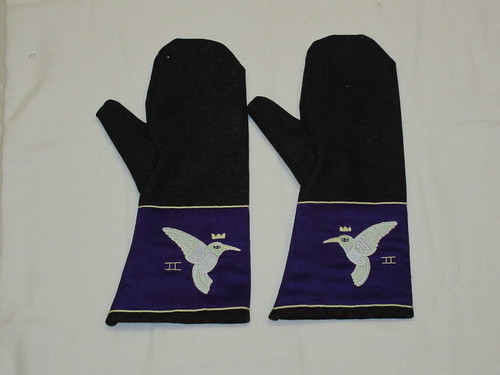
I had a lot of fun with these, since I had a lot of latitude for design work.  I decided to go with a Viking theme, since they both have some great Viking kits.  I wanted to use their heraldry in a way that maintains the artistic aesthetic for the Viking age.  I spent quite a bit of time futzing with the designs until I found something that I really liked.  My inspiration was largely woodwork and stonework designs from the Viking era.  Here is the hummingbird for Antigone.

20150827_195204

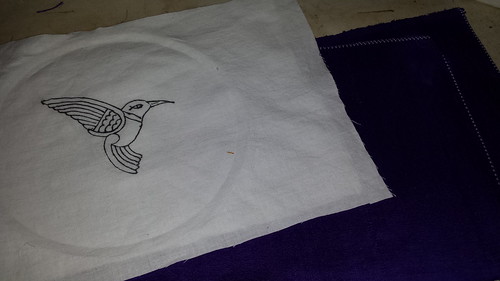
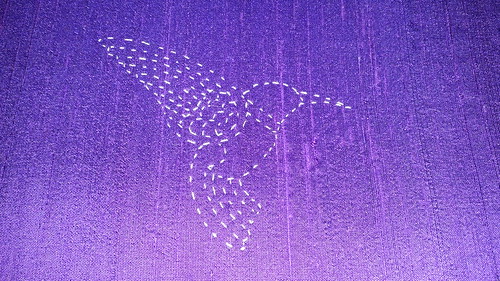
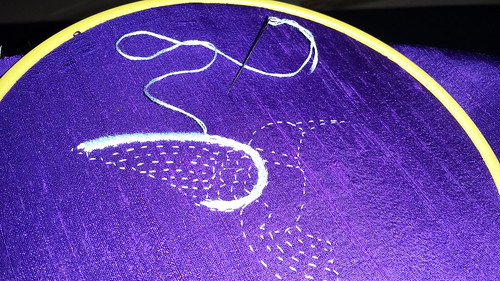
The ground fabric for the embroidery was a nice Dupioni silk.  I drew the hummingbird on the muslin that I was using to reinforce my silk and then basted the design to show on the front.  Below are the front and back showing the tiny basting stitches.  

20150827_203816

20150827_203827

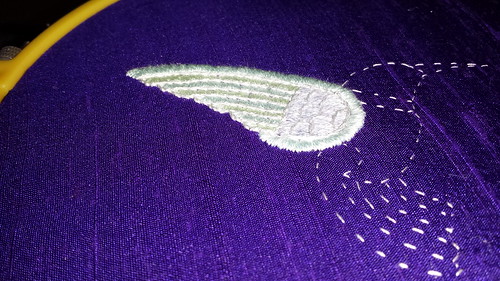
I wanted a little bit of depth on the hummingbird, so the arc of the wing has a layered stitching underneath the satin stitch.

20150828_222012


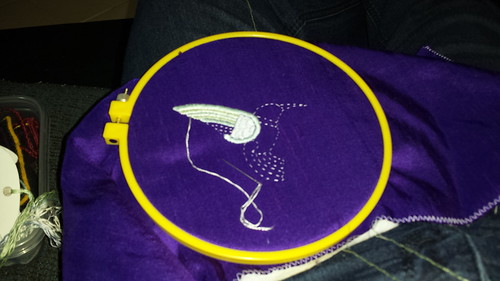
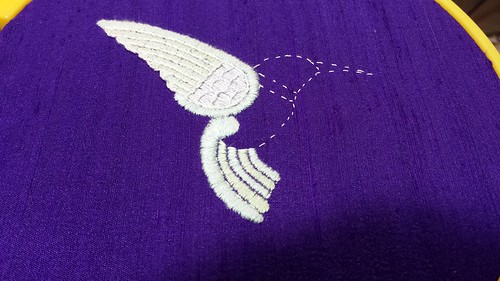
The stitching is in Rainbow Gallery Splendor silks, which is a spun silk.  Both Antigone and Sven have white charges on their devices.  The Viking aesthetic would have been lots of bright colors.  I decided to take a bit of artistic licence with the colors.  I chose a color palette with lots of colors, but then picked extremely washed out versions of the colors.  My goal was to see lots of colors up close, but for the charges to look white from a distance.  Here's a fuzzy progress  picture of the stitching.

20150829_174323

Here's another progress picture for the hummingbird.  The fill stitches are a variety of colors and the outline is all in white.

20150829_184712

20150829_212941

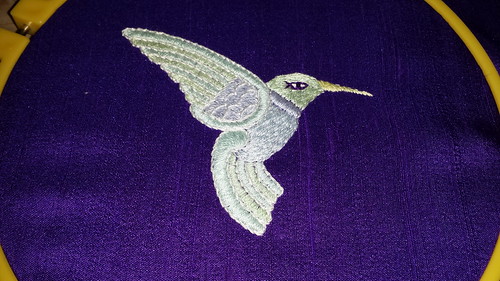
I pulled some threads from the dupioni and used them for the eye embroidery.  And here is the finished hummingbird!

20150830_165222

Tuesday, March 3, 2015

Finished Byzantine Silk Swatch

Outlining is finished
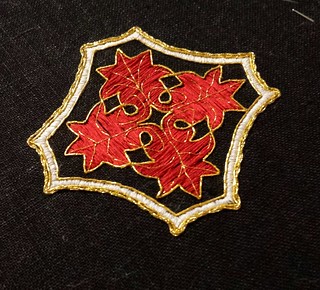
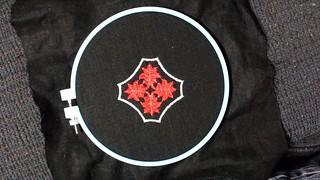
Above is the entire design, with a Japan gold outline.  I let it sit for a few days and felt it needed a bit more zing.  After rummaging through the gold thread bin, I found some nice twist left over from Giant Sparkly Banner.  I used this twist to add one more round of outlining and it really completed the design.  Hooray!

Finished stitching

Monday, February 23, 2015

Byzantine Silk Swatch

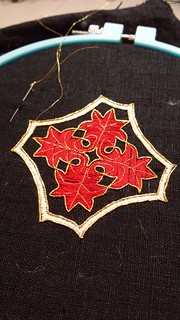
Fill for the leaves are done Starting the outline stitching

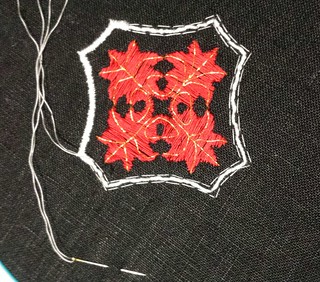
I've been stitching along and making progress.  The leaves finished up nicely and although the red isn't as full as I'd like on the stitching, the shiny silk lends some forgiveness.  I used a fat pearl cotton to padd the border stitches and started in on the white.

Satin stitch border is finished

And I finished out the border!  The pearl cotton didn't provide as much loft for the border as I had hoped.  I think that next time I will need a fatter stitch to give a bit more dimensionality.  Just back stitching seemed so fat next to the leaves so I was afraid that a stem or chain stitch would add too much bulk, but I could have added more.  I like the coverage on the border though and the contrasting stitch directions is a nice design element.

Outlining with Japan gold

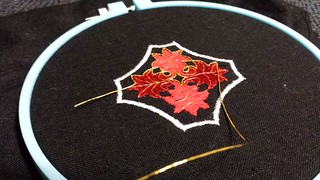
Here is the start of the shiny gold!  It's finally coming together and starting to look pretty spiffy.  I took an angled photo so show some of the depth that the silk shine adds to the piece.   I've got a Kreinik Japan #7 here for the leaf outline and it has a very complementary shine.  I fiddled with a number of gold options, but the Japan was really what I needed for all those curves and tiny points.  I probably could have gone a teensy bit smaller and used a Japan #5 just because the design is so detailed, but I didn't have any #5 on hand and I am trying to pull supplies from my hoard.  Although the #5 would have been a bit more delicate, the #7 works just fine and really isn't too bulky for the outline.

Monday, February 9, 2015

New thread!


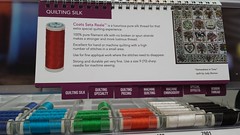
I really wasn't going to start anymore new projects. I've buckled down and focused on knocking things out of my queue with the goals of gulf wars preparations.  But appliqueing a gajillion halberds takes a half a gajillion spools of thread, so I just had to go to Joanne's.  And while I was on task in the thread aisle, this little display lured me in and caught me.

Thread display Thread display, more colors

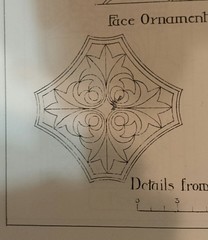
How could I pass up filament silk at a good price?  I could not.  So, I bought two spools to play with, one in red and one in white.  My intentions were a quick test of the thread so that I could decide if I really liked it.  Once I had the thread it was really soft and shiny and "oh so" pretty!   Also rumbling around in my mind was the desire to make something for a friend.  These two motivations were all I needed as an excuse to have fun in the design phase.  I found something I liked in one of my favorite design books: "Treasury of Byzantine Ornament" by Arne Dehli (published by Dover).

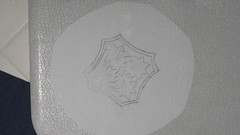
Design pattern Template

Above are a snapshot of the original and my template on tissue paper.


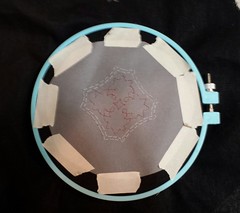
Stitching the pattern outline The stitched outline

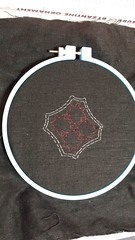
Transferring patterns to black fabric is always a challenge.  I am ever the optimist - feeling that one day I will find a transfer method that make me happy.  The truth is that the process is fiddly no matter what the approach.  This time I chose to pre-stitch the outline from a tissue paper template.  This method is popular with a lot of fine embroidery enthusiasts, especially on dark fabrics or fabrics that won't or shouldn't take a pen or chalk or other potentially messy options.

I shouldn't have used the silk on this step.  It was so smooth that the template really didn't want to come off and the stitches got pulled around too much.  After a bit of coaxing and pulling some of the stitches from the back, it finally looked good again.


Stitching progress

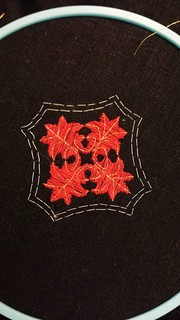
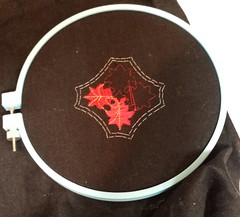
And here is the first bit of stitching.  I'm doing laid work in the red with gold highlights for the couching.  The gold approximately matches the detail lines from the original drawing.  The filament silk is very shiny and as fiddly as filament silk is expected to be, but not really more.  I'm planning on a slighly thicker gold for outlines and the border in white.

I hate progress pictures at this point.  The silk is still a bit wonky.  The couching is freshly done.  The outline isn't in yet.  The whole thing is just "off."  I share them with you, my dear readers, because those who truly inspired me do the same.  Pretty things don't start pretty.  There is a magic point along the way where it all blends together and starts to look nice.  Sometimes it doesn't actually blend and those projects are educational as well.  I don't think I would have been brave enough to try some of the techniques that I've seen in project blogs if people didn't share these "in between" progress pictures.  In that spirit, here are mine.  I hope this one works.

(With that little aside, the red is lucious and the gold is sparkly, and distances are most forgiving - so I am optimistic)

Friday, December 19, 2014

Long arm cross stitch

Today I'm just sharing a little bit of stitching progress from this project: http://helenestuff.blogspot.com/2014/10/long-arm-cross-stitch.html Stitching progress on long arm cross stitch piece

Thursday, October 23, 2014

Long Arm Cross Stitch

In the past, I've fiddle around with long arm cross stitch, but didn't really feel like I'd really mastered the skill. It's not that the stitching is particularly hard, it's just that it's different from a lot of counted work I've done so far and it was hard to split my attention between a chart and a stitching diagram. Additionally, even when I have projects on the frame I like to have a lap project that I can carry around with me. I needed something was portable and not too fussy to pick up and put down frequently. Then the other day, I ran into a lovely little pouch based on the Goss vestments and I felt really inspired.


The handout very nicely put together and contains a great summary of the project. The original is from the blog http://www.zeitboten.de/seiten/u6almosenbeutel_goess.html . The pouch was so pretty and I thought - here is a pattern that doesn't need a chart! Hooray!
Long arm cross stitch
One thing that really makes long arm cross stitch look nice is the shine off silk provides a directionality and flow for the stitching. My spun silk is soft and nice, but not as great on shine. I rummaged until I found a box of cheap sari silks that I bought a few years back on an impulse buy. They aren't the nicest silk, but they have a great shine! I debated ground fabric for a while. I pulled out several great options - evenweave linen, some monaco cotton, and some aida. Ultimately, I surprised myself went with the aida. I have lots of it floating around. The aida is designed for cross stitch and it makes stitching easier in challenging circumstances. A lap project should be friendly and I figured there would be less squinting and fidgeting with those perfect little squares. The aida makes for a heavier ground than the linen does, but the stiffness also means I don't need a hoop - which is another plus for portability.
2014-10-23 11.17.47
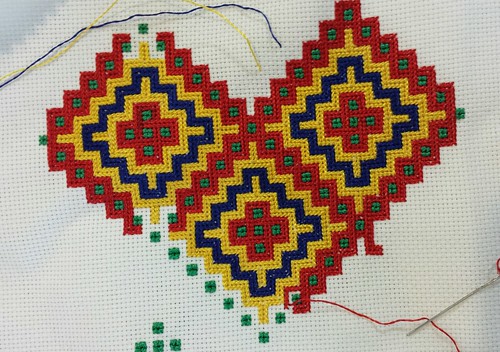
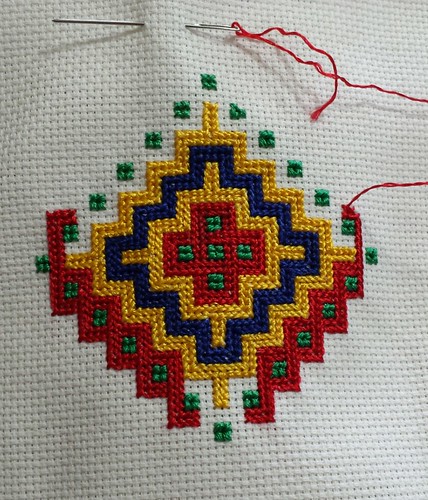
Now that I've made some progress, I can confidently say that this is a great lap project! The aida makes life easier and the silk has amazing shine. I really, really love the texture of the stitching; it makes an interesting geometric pattern really beautiful. The silks are as fussy as I remembered and they have these little slub chunks that are truly infuriating, but they were cheap enough to use on random projects. The first square was very easy to stitch, with almost no counting. I just followed the stitch lines and the geometry remained true. When it came time to start the second square I realized I needed a method, but the counting turned out to be very easy for this design. I haven't really figured out the final parameters of the project, so the connecting knot work on the edges is left open until I make some decision. I think if it's a pouch then it should be at least two squares in width. The ground is an 18 count aida to give some scale.

Thursday, May 22, 2014

Acts of random dye-ness

{Wool, nice spun silk, cheap silk} dyed with red cabbage

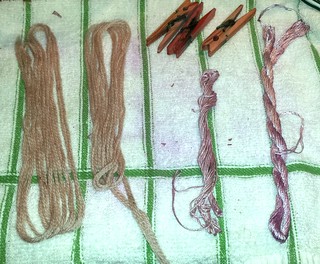
 I was making myself a nice cabbage dish the other day and couldn't bring myself to throw out the pot of bright purple water.  So, instead I added some thread.   Perfectly logical.  Anyway, here's the results of the test run.  Above is are the three samples {wool, nice spun silk, cheap silk} dyed with purple cabbage using a cream of tartar mordant and a bit of vinegar on the rinse.  I like that all three of the pinks come from the same batch.  The cheap silk made the brightest pink.  Also, since purple cabbage makes a nice litmus test (literally) you can see the clothespins with their nice basic wood (pink) and apparently something acidic going on with the metal (green).  You can use your excess cabbage to make litmus strips and test all the things for fun!  Science! Yay!

I liked the result and then got to thinging "Now what am I going to do with this?"  Obviously I needed another color, so I found another skein of the cheap silk and let it stew in the left-over coffee from yesterday.  After drying I got a really nice yellow out of it.  So there you have it - random project complete.  I'm really not sure what I'm going to do with it yet.  The colors on these threads will be more delicate, so I won't make anything that must be washed frequently or with gusto.

Dyed another skein of the cheap silk.  I used left over coffe :)

Thursday, March 13, 2014

Lucet all the things!

I've been playing around with various new threads and my lucet. I've been looking for good options for the silk look without spending quite so much money. First up is a bamboo and silk blend from Patons. It handles and feels like a quality spun silk. I really liked it.

Paton's metallic is definitely a modern looking yarn that looks kind of like the fabric that jerseys are made of. It lucets up fairly easily and looks very nice. It definitely has a higher screen than the spun silk, so it's a little closer than the look of filament silk. It's a bit slubby, but doesn't look bad.

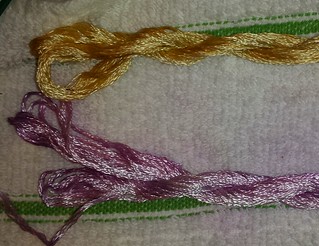
Next up is plain old DMC perl cotton, but I was testing out a two strand technique. The technique runs the slip nots for each color on either prong of the lucet. The method creates a twist between the colors. The resulting cord has four side: a purple side, a yellow side, and two sides that have the mixed colors. It's rather fetching.

Wednesday, April 3, 2013

(Very) Tiny Purse

I was chatting with our gift coordinator for the crown and she mentioned that they were a bit low on largess, so I decided to make a little something to make her job easier. This little project combines three "to-do" things on my list: eyelet practice, twisted cords, and up-cycled shirts. I've been meaning to practice eyelets and have yet to feel comfortable with them. This little project had 12 of them - and I think I've got the hang of it now. Recently one of the blogs I read posted a tutorial on quick twisted cords and I had been meaning to try it out since I don't seem to have a good track record on finishing long finger loop braids to finish out projects. Finally, I was gifted a box of old silk shirts from my sister a while back and I have been wanting to use them for more projects. Most of the shirts have large chunks of silk that is still nice, so I just have to dissect them and pull out the good bits as I go. The silk for my apron dress is my first shirt project. This is my second. purse This is a simple little circle purse in silk with twisted cord silk drawstring. I put my favorite teas in it as a little bonus :) When I patterned it, I had intended that it be large enough to have the tea totally inside, but drafting patterns just really isn't my strong suite. Oh well, another skill to work on. The eyelets turned out very nice and surprisingly consistent. They are a little snug for the draw string, but they work. Even as a tiny purse I think it works out well with the tea and the silk is so shiny and soft that it still makes me happy.

Monday, August 20, 2012

Starting an apron dress

dress I've started work on an viking apron dress! I finished sewing it last week and had some time this weekend to get started on the embellishments. The sewing went well and all more gores are pretty and lay flat, so I was very pleased. It seems that completing a dress is only the first step, since there is lots of decoration to do. I started work on the embroidery, since that should go fairly quickly.

I follow a lot of blogs of people I don't know who do nifty things, and I have been particularly inspired by Ari's embroidery. I have a box of worn out silk shirts that I use for scrap on projects and wanted to use it for applique. I didn't want to use wonder under for the applique though, since it would make the silk too stiff and weird. So I took a leap of faith and tried Ari's techniques. I think most of her stuff is wool, so I may regret using fiddly silk, but hey - it's "free" stash fabric, so I may as well give it a try.

First step is getting the fabrics sewn together and the pattern transferred. I traced the pattern on some tissue paper and then put the dress + silk + tissue paper in an embroidery hoop on the sewing machine. The hoop kept the silk from slinking around and gave me some maneuvering control. Spirals on a completed dress on a straight stitch is probably the path to madness, so I've got an embroidery/quilter's foot on the machine to do the work free hand. Below is a picture of the set up. It worked pretty well and my only complaint was that the hoop should have been a bit bigger for better maneuvering (but there's a trade off for fabric tension with that slinky silk). My 4-year old was fascinated by the process, so I got some "helping", which resulted in some wiggly lines, but that is fixed later. machine Here is the result off the machine. Silk is sewn down and pattern sewn in. Don't worry, it gets prettier with more stuff on it. work1 Trimmed away the excess fabric and loaded it up into a hoop. Now we are ready for embroidery time! work2 My first concern was anchoring down the edges before the silk totally shredded and getting the edge decoration done. I really liked Ari's anchored chain stitch approach for strength + decoration, so I gave it a shot. It took a few stitches to get the rhythm right, but I like the way it turned out and it seems to be holding up. In my zeal to anchor the silk firmly, I think that I used stitches that were just too small for the anchored stitched. I probably should have made them twice as long, but I was so worried about a strong anchor, shredding silk, and edge coverage that I was perhaps a bit too enthusiastic. There are a few little silk shreds poking through, but not as bad as I had worried. Of course the whole silk background may disintegrate after washing, but I will still have some nice surface embroidery, and that's how experiments go. outline Next is filling in some of the pattern. I worked the spirals in stem stitch and the inner circle in chain stitch. I'm still working on my stem stitch technique, but it is improving and I think that it will hold up. As I'm stitching, I am also pulling out any stray wiggles from the sewing machine thread. This keeps things looking tidy and keeps too much fuzz. work3 So far, I really like it. The embroidery over silk lends an almost quilted quality that gives it some depth and shine. It's actually nicer than I expected. Next up is the gray fill for the outer and inner circle designs.