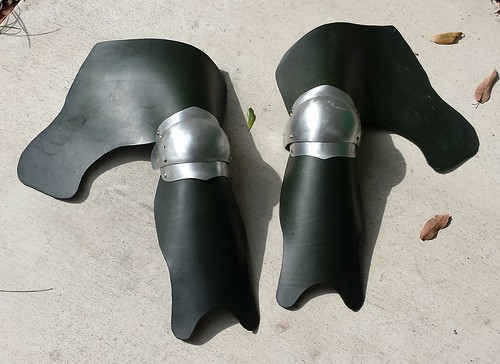
I've resumed work on upgrading my armor, starting with the legs that I was working on. The pieces had been previously cut and dyed, and then laid on a shelf where they weren't doing much of anything. So, this weekend I decided to make some progress. I punched rivet holes and gave them a nice coat of neatsfoot oil. The oil darkened the green dye a bit, but greatly improved the handling and feel of the leather. In the picture above you can see the legs partially assembled with the knee cops.
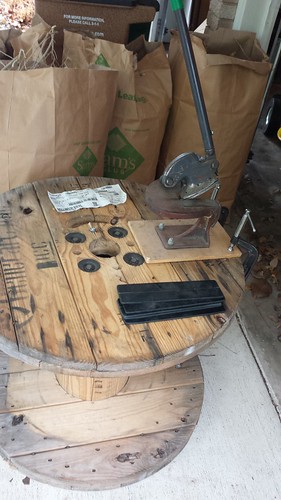
I borrowed some beverly shears from a friend of mine and got to work cutting out plates for splinting the thighs. I've mounted the shears using some C-clamps onto a wooden spool that I picked up for $5 from the electric company. The spool is heavy enough to be sturdy, small enough to fit in the back of my micro van, and the round shape makes it relatively easy to move around. This setup worked really well and I got all the plates for the thighs cut out.
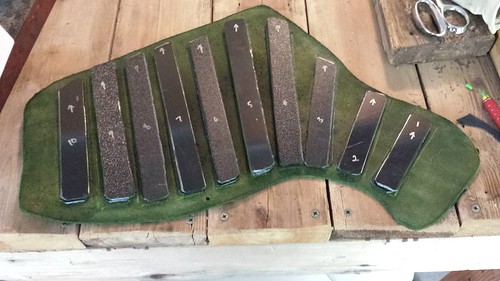
And here is what two sets of thigh splints look like after they are pattern drafted, cut, and laid out. I still need to grind the edges, since they are a bit rough in places.
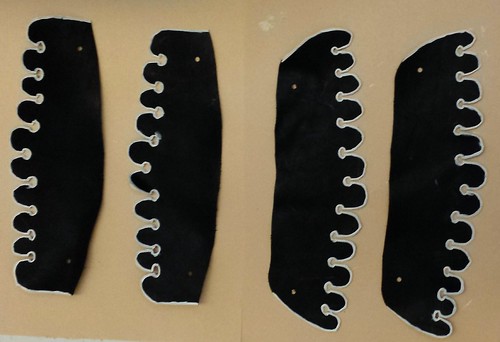
What armor kit would be complete with out some fashionable bling? Ok, it's 14th century fashion, but still - fashionable. I pulled out some thinner black leather and cut dagging strips for my knee cops. The black helped contrast against the green, making it appear less dark. I decided that the contrast needed a bit more zing, so I painted a white border around the edges of the dagging. It looks even nicer than I imagined! As an added benefit the paint sealed the leather on the edges and made the dagging cuts look more tidy.