Showing posts with label westphalian brickstitch. Show all posts
Showing posts with label westphalian brickstitch. Show all posts
Sunday, January 24, 2016
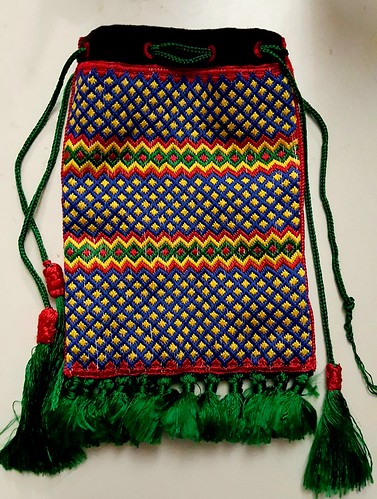
Brickwork pouch
The last few bits always take the longest, but here is the brickwork pouch almost complete. I have one more tassel to go!
Wednesday, November 11, 2015
St Martin Panel
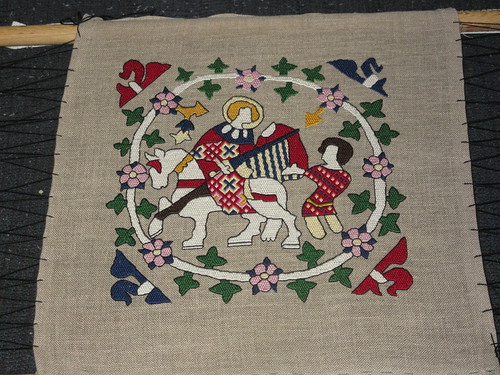
Look at what I found! I have picked up the St Martin's panel again and this time I intend to finish it!
Tuesday, September 9, 2014
Brick stitch pouch
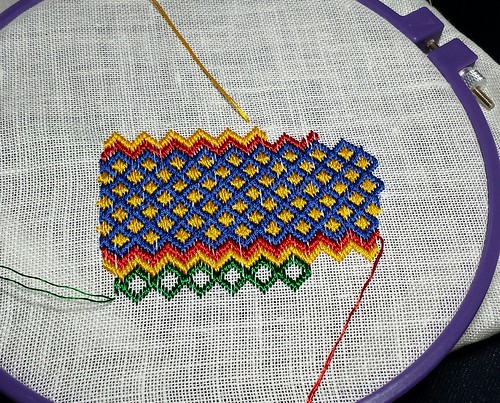
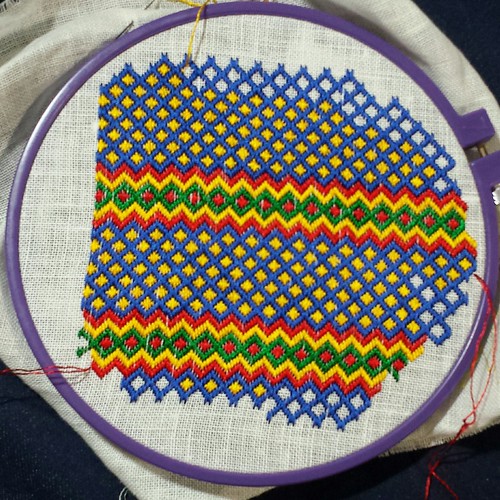
Sometimes I post pictures to my Flickr feed with all intents to write about them - and then forget. Such is the fate of the brick stitch pouch that I am currently working on, so we will take a quick trip back in time. This project started out as a quick doodle to test out some new fibers that I picked up at the local embroidery store. Having recently played around with some filament silk, I was looking for something that was a cheaper approximation of that pretty high shine and that soft hand. DMC has recently changed their rayon line again, so I pick up some DMC red and green. The Reaissance Designs "Silky" threads were another synthetic option that was just so shiny and soft that I had to get a couple of skeins in blue and yellow.
I started stitching this little doodle using an impromptu brick stitch pattern and was really having fun with it. It just kept getting bigger!
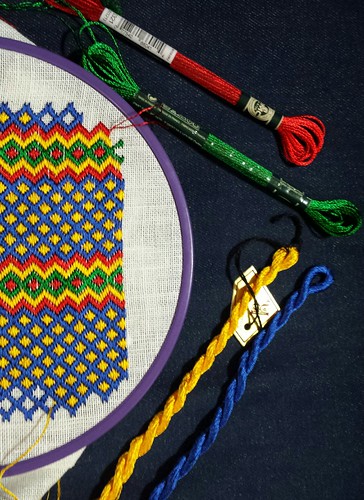
The DMC rayon is in a very familiar skein, that are individually wrapped in a plastic tube. The rayon is very slippery and easily separates into six strands. Each strand barely has any twist at all and reminds me in feel and look of flat silks. I used two strands for the stitching on the 28 count linen, but I think that next time I would use three. The fibers are finicky like silk, so got find your hand lotion and check your cuticles. I love the feel of stitching with this rayon and really, really love it bright shine. I do not like the feeling of starting, finishing, or tying off knots with this thread because it fights back and seems to leave you with the feeling that the second you turn your back it's going to spring out of place. After finishing the stitching however, the piece feels very solid and I don't have anything wiggling out the back. The threads do snag, so you have to be careful with your hands and environment. They can also tire easily, so shorter lengths are better or you get fuzzy parts. Overall, the red and green are beautiful and shiny and soft, and I think they are a good option for that silky look.
The Renaissance Designs "Silky" comes in a lovely twisted skein and also separates out into smaller threads. These threads seem more solid than the DMC threads and were much less likely to fuzz or snag. They had the same springiness that made starting, finishing, and tying threads a bit unnerving. Two strands of the blue and yellow provided really good coverage on the linen, but they seem to have more texture and less shine. Some of the texture comes from the threads having a bit of a twist, so if you are looking for that twist this thread is a good option.
At this point, it was clearly a "Project that Must be Finished" and so I had to figure out what it was going to be. (to be continued)
Tuesday, May 29, 2012
Reliquery box
Out of the weekend of general craftiness at Casa de Clermont, a plot was hatched by my friends to build this box.
 I've started work and charted and stitched a sample for the first pattern
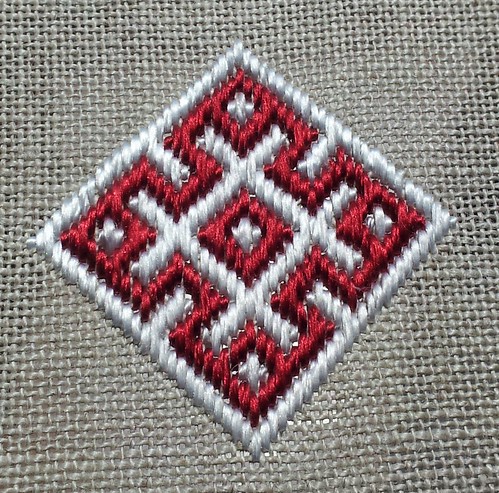 I decided to get even closer to period practice and stitched this with a flat silk, Soie Oval. I have to say not only is the result very close to close up shots of period pieces, but its gorgeous! For comparison, here is a picture in the same light of sample in similar colors in a spun silk (Rainbow Gallery Splendor)
 And for fun, here is a nice close up of a period piece from the same time and place:
 We've started chatting about other construction details and I'm very excited about this project. I will post updated pictures and samples as we make progress. I've got 4 patterns charted so far and I think we will start work on the panels as soon as we order the silk.
I've started work and charted and stitched a sample for the first pattern
I decided to get even closer to period practice and stitched this with a flat silk, Soie Oval. I have to say not only is the result very close to close up shots of period pieces, but its gorgeous! For comparison, here is a picture in the same light of sample in similar colors in a spun silk (Rainbow Gallery Splendor)
And for fun, here is a nice close up of a period piece from the same time and place:
We've started chatting about other construction details and I'm very excited about this project. I will post updated pictures and samples as we make progress. I've got 4 patterns charted so far and I think we will start work on the panels as soon as we order the silk.
Friday, June 3, 2011
St Martin's panel progress

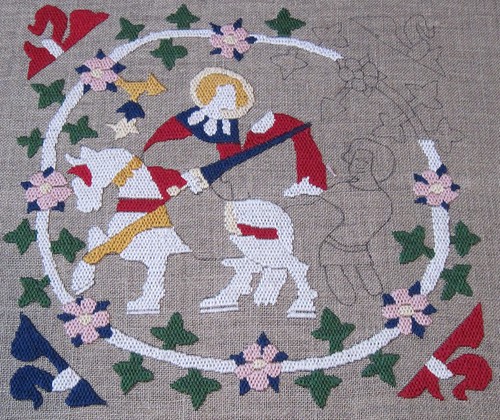
I've uploaded some progress pictures of the St Martin's panel to Flickr. The above picture shows the current state of things. I've finished the color fill stitching and I'm working on the outlining.
The next thing that I have to think about is painting on the faces. Lady Sabine Berard has generously posted some pictures from the Cloisters at the NY Met. In them, she has a great close up of a painted face from a piece that came out of the same convent: picture. In this particular piece the face is done in "encroaching Gobelin stitch" and painted on, but on the St Martin's panel they just used a regular brick stitch as the foundation.
Unfortunately, I haven't read much on what kind of paint was used for the face. From scribe's guild I know that gouache paint is a good modern equivalent for scroll work, but I'm not sure for painting on embroidery. I'm still looking for sources though, so if anybody knows anything, I would be most grateful.
Friday, May 13, 2011
More Gloves!
I've been remiss in posting, but here is the current state of things. Pictures are included of the three gloves that I have completed for the crown. After I finished the stitching, Rachel came by and helped with the construction and finishing which speeded things along. I'll do some more posts that show construction updates, but I couldn't resist posting the finished gloves. The pictures don't really capture the shine of the silk or the sparkle on the gold (especially the highlights on the Queen's glove).
King's Gloves: These are padded goldwork on a woven wool foundation. I used wool felt for the padding to give it a bit of dimension.

Queen's Glove (Front)
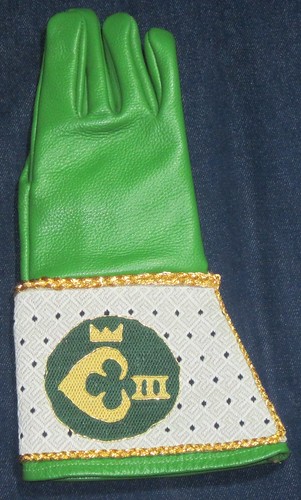
Queen's Glove (Back)

King's Gloves: These are padded goldwork on a woven wool foundation. I used wool felt for the padding to give it a bit of dimension.
Queen's Glove (Front)
Queen's Glove (Back)
Tuesday, March 1, 2011
Royal Gloves II
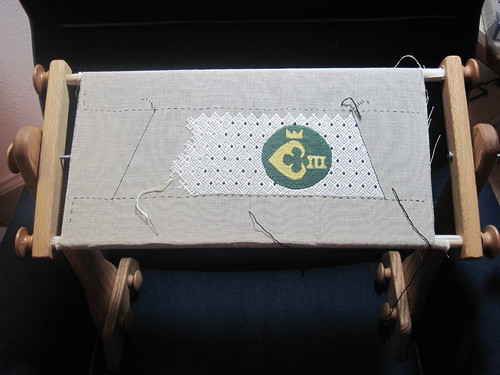
Here is my current progress on the second set of royal gloves. This pair is for the queen and has the same sigil as the first pair, but is in her colors. I added a background so that the whole cuff would be stitched. The background is an "E" pattern for Ebergardis and made to look like ermine (from her device). Rachel helped me put the background design together and pick out colors. The "E" motifs are in a very, very light gray and the lattice work is in white. Its always hard to imagine how repeating patterns are going to turn out, but I think we got a nice homage to ermine on this one.
Also featured in this picture is the lap stand that I got recently. I am really enjoying using it. The stand design really limits its usefulness to frames of a width pretty close to your lap width, but it has worked well for my current projects. I'm starting to ponder floor stands for some other work. I'm a bit torn between exploring modern frames and medieval frames. I'm not sure which I'm going to look at first.
Monday, February 7, 2011
Gloves #1 are finished!
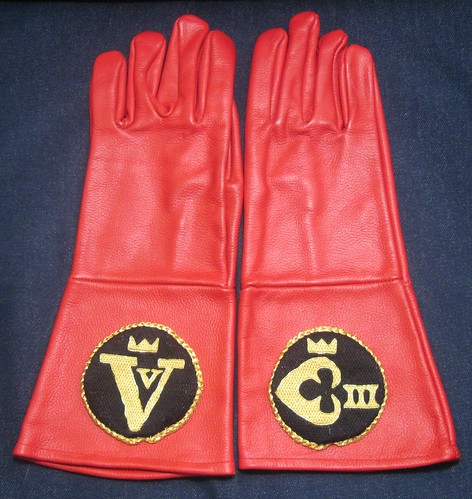
I have finished the first pair of royal gloves for Their Stellar Majesties Ulsted the Unsteady and Ebergardis von Zell. The stitching is done in German Brickwork and is Rainbow Gallery Splendor silk on linen, with Kreinik Japan Gold #7 couched as outlines. I sewed the stitched roundels onto the gloves using a leather awl and the trim is braided Kreinik Japan Gold #7. The gloves were delivered at Bryn Gwlad's Candlemas event.
Details:
Since I was attaching the stitched roundels to leather gloves, I rummaged through my toolbox and found my leather awl. It was definitely the right way to go, especially since the gloves were already put together and I had to reach inside them. The German brickwork stitching has a lot of body when finished, which makes for a really thick finished piece. Even with some tight stitching on the edges I found that I needed a thick trim to keep the edge from being too abrupt.
I tried several different approaches to the trim. I think that finger loop braiding can make really nice trim, so I tried a few different patterns and discovered that Japan gold is terrible for finger loop braiding. It doesn't hold tension well, stretches unevenly, and doesn't flex gracefully - so you end up with a chunky mess that glitters. I was going for something a bit more elegant than that so I tried several flat braids. The final winner was a three strand flat braid with 6 pieces of Japan gold per strand - 18 total strands. The result was a smooth trim which (with some fiddling) I got to lay at a (mostly) 45 degree angle to smooth the chunky edges.
Thursday, November 11, 2010
More progress on St Martin
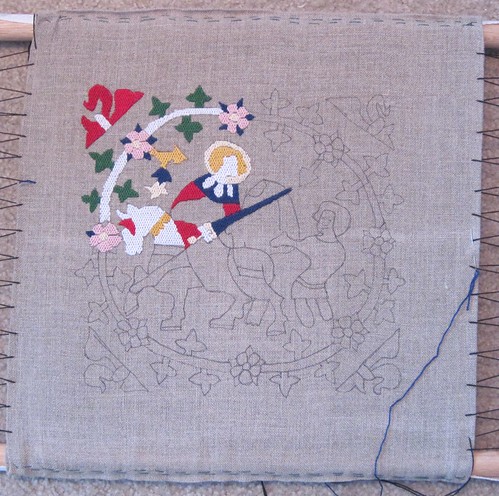
Here's a bit more of the progress on my tapestry panel. I haven't done much the last few weeks, but I got a nice bit done earlier.
Friday, September 10, 2010
Some more stitching progress
Here's some more stitching progress. My stitching queue has been filled up now and I'm trying to work out how to juggle it. I still have the tunic to finish and now I'm designing gloves. I also realized that I forgot to do some follow-up from folks I met at Laurel's Prize, so I'm going to try to get that taken care of this weekend. Additionally, I have some armor repairs that I really need to do. Its harder to find shop time than stitching time - so I'll have to work at finding a way to that. Busy, busy, busy!

Monday, August 23, 2010
Panel progress
Some more stitching progress on the panel. I'm hoping to get a nice chunk of it done before Laurel's Prize Tourney this weekend. I'll be taking the panel and a pile of my embroidery, as well as the pattern swatches that I've done.
Wednesday, August 18, 2010
Panel progress
Here is the initial progress on stitching my panel. I'm really liking how vibrant the colors are, especially in contrast to the tan linen. I started stitching in a corner and am moving, but I think next time I will start from the center out. I'm afraid that I'm going to abuse the outer stitching while trying to get the inside stuff done. Fortunately I have three other corners free so I think I can still get the center without messing up the already stitched corner.
Sunday, August 15, 2010
Source and sketch for St. Martin's panel
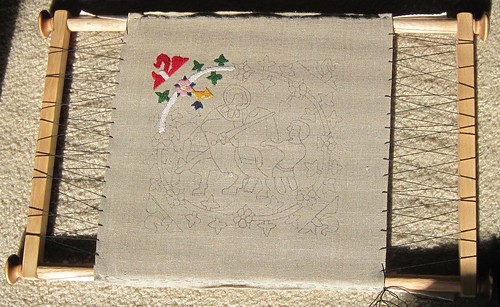
I've actually started my panel. I've got the frame dressed and the pattern traced, so now I just need to get started stitching. I've included a picture of the original from Bildindex below.

Friday, July 23, 2010
Finished white work
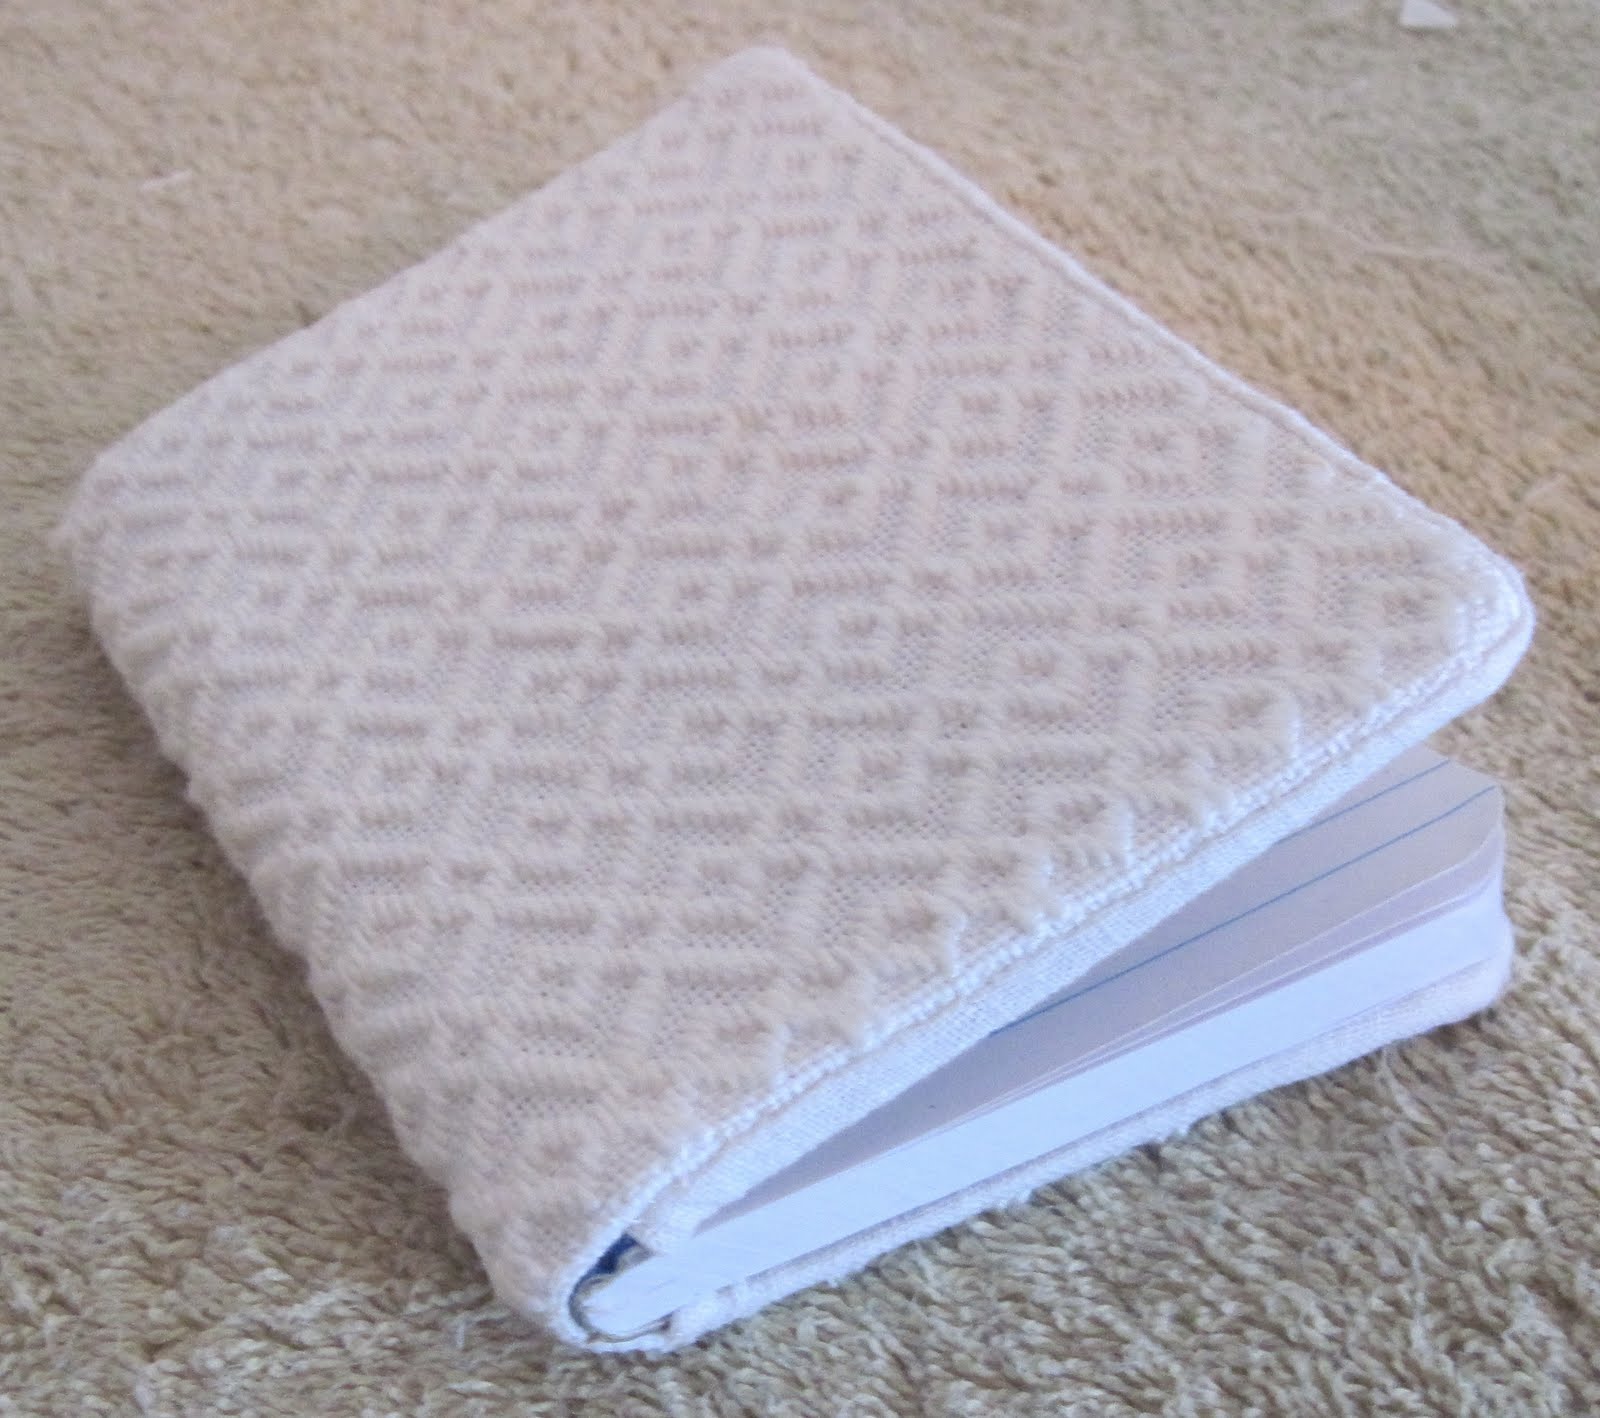
More pictures of stuff that I have been finishing up post dissertation time :) Here is the white work that I took off the frame and started to finish some time ago. It's stitched in Londonderry white linen thread on a white linen background. This style uses many of the same patterns as the silk work that I have been working on, but has a larger geographic area and a longer time period of use. The pattern is a small (4.5 inches x 3.25 inches) notebook cover.


Thursday, February 18, 2010
Gulf Wars Preparations
I haven't had a lot of time for SCA stuff, but the time I've used has been on preparations for Gulf War. Rachel and I have made a garb generation plan, divided up fabric piles, taken measurements, picked patterns, and even begun making stuff. A whole week is a lot of garb!
We need to get Rachel's coat of plates finished, so I've been working on that. Its going to be just like mine, only shorter and in brown. This weekend, I finished cutting a pile of plastic plates for it and marked all the drill holes and grinding points. I handed them off to Rachel and she's going to do the next bit.
Cutting out the rest of Rachel's plates pretty much finished off our second plastic barrel. I picked up two more for a friend who is also trying to get her armor going. I've gotten a couple of questions about the plastic barrels, so here's the scoop. They are trash for the local car wash, so they let me pick them up for free. This picture below shows one of the barrels with a 6 inch x 24 inch quilting ruler, so you can see that they are quite big. Always check the labels on your barrel and make sure you don't pick up one that held anything toxic, and clean them out well just to be safe. We cut ours up with a jig saw, and the plastic sands and drills nicely. As the barrel gets cut down it starts to vibrate with the saw. I solved this problem by nailing it to the workbench, which worked really well. The curve to the barrel works well for the coat of plates (but you do end up looking a little barrel-like).

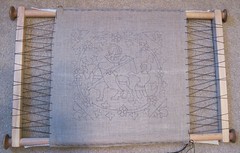
With all the busy at work and armor projects, I haven't stopped making pretty things, I've just slowed the rate. The picture below shows some German white work that is currently on my frame. Its a yummy linen thread on linen that I picked up on an impulse at Christmas. The texture on the white work is turning out very nice, but the linen thread is a bit temperamental. I have to use short lengths of it because it tires easily and ends up fuzzy. The pattern is Pattern #14.

We need to get Rachel's coat of plates finished, so I've been working on that. Its going to be just like mine, only shorter and in brown. This weekend, I finished cutting a pile of plastic plates for it and marked all the drill holes and grinding points. I handed them off to Rachel and she's going to do the next bit.
Cutting out the rest of Rachel's plates pretty much finished off our second plastic barrel. I picked up two more for a friend who is also trying to get her armor going. I've gotten a couple of questions about the plastic barrels, so here's the scoop. They are trash for the local car wash, so they let me pick them up for free. This picture below shows one of the barrels with a 6 inch x 24 inch quilting ruler, so you can see that they are quite big. Always check the labels on your barrel and make sure you don't pick up one that held anything toxic, and clean them out well just to be safe. We cut ours up with a jig saw, and the plastic sands and drills nicely. As the barrel gets cut down it starts to vibrate with the saw. I solved this problem by nailing it to the workbench, which worked really well. The curve to the barrel works well for the coat of plates (but you do end up looking a little barrel-like).

With all the busy at work and armor projects, I haven't stopped making pretty things, I've just slowed the rate. The picture below shows some German white work that is currently on my frame. Its a yummy linen thread on linen that I picked up on an impulse at Christmas. The texture on the white work is turning out very nice, but the linen thread is a bit temperamental. I have to use short lengths of it because it tires easily and ends up fuzzy. The pattern is Pattern #14.

Monday, November 2, 2009
Pattern #16
This little swatch got lost along the way somewhere, so I picked it up this weekend and finished it up. Behold, pattern #16! I'm going to have to do another round of charting, since this was my last un-stitched chart. I've got some other stitching to do while I'm in charting mode, so I'll get to keep stitching. I've got a tunic that I need to finish before the next event, so I have enough garb to make it through the weekend.


Pattern #15
Here's pattern #15! I really like this one. I think that you could use it fairly neatly as a border as well.
The interlocking red is stitched correctly, but the edges have several problems. On each point, some are clean points and some have little "V" notches to connect to a diamond. The points along the edges are haphazard in which have notches. I did manage to do them correctly on the middle row, so the pattern clicks. I'm considering re-stitching the sample, but I figured I'd post it anyway. I was just chatting away while I was stitching and did not pay enough attention. It was a lovely evening though.
The pattern is correct :)


Wednesday, October 28, 2009
Brickwork notebook cover
I just finished the stitching on a small notebook cover that I've been working on. I wanted to do another piece that was bigger than my little pattern swatches. I bought some tiny composition notebooks and am going to make some notebook covers. This is the first. Next step, sewing it together.
Today, you get a pretty picture :)

Today, you get a pretty picture :)

Saturday, October 3, 2009
Gryphon complete!
I've finished my little guy :)

Also, I forgot to post earlier, but here is the original inspiration for this particular critter. Its plate 272 in the Kroos book. Plate 271 has a gryphon almost exactly like this one. They are both part of a larger repeating border. I picked the colors from what few color pictures I've seen of similar pieces (none available of this particular critter). It seems that the void work patterns are usually done in white, while the rest is usually done in brightly mixed colors. Also, the stitching direction (horizontal or vertical) varies by piece as well. I haven't really seen any rhyme or reason to which way it goes. I started this one vertical before I realized that the piece that I was working from was horizontal. Oh well, it still works :)


Also, I forgot to post earlier, but here is the original inspiration for this particular critter. Its plate 272 in the Kroos book. Plate 271 has a gryphon almost exactly like this one. They are both part of a larger repeating border. I picked the colors from what few color pictures I've seen of similar pieces (none available of this particular critter). It seems that the void work patterns are usually done in white, while the rest is usually done in brightly mixed colors. Also, the stitching direction (horizontal or vertical) varies by piece as well. I haven't really seen any rhyme or reason to which way it goes. I started this one vertical before I realized that the piece that I was working from was horizontal. Oh well, it still works :)

Friday, September 11, 2009
Fill stitches completed!

I've finished the fill stitches for the little guy! I've had lots of little time increments lately, so it has moved quickly. Next is the outlining, which should give it some more definition. I don't have my next critter set up yet, though I have a couple of them outlined. I haven't had any good blocks of time to actually setup the next one, so I'm not sure what I'm going to do.
As an aside, I have to once again marvel at what beautiful backs this style of stitching makes! Here's the back of the critter:

Subscribe to:
Comments (Atom)