Showing posts with label applique. Show all posts

Monday, January 26, 2015

War Company surcoats

Sometimes projects take on a life of their own in crazy ways. A number of years back, I ran a sewing day to assembly line surcoats for the Bryn Gwlad War Company. We finished off a decent number of surcoats (maybe 6 or 7?) with a team of five people. That kind of efficiency is possible with a well-run assembly line because you have lots of unskilled labor doing the time consuming things like ironing and cutting. This leaves your skilled sewing folks to do their work.  

 So.... it became clear recently that we needed another batch of surcoats and I volunteered to host and run the assembly line. I decided that this time I would teach a few people how to run one of these things so that we could replicate institutional memory. ISO compliance maybe? Anyway, as I started putting together checklists and spreadsheets, this thing kept getting bigger. It turned out that we really, really needed surcoats.

With two deputies, we hosted 24 people over two days of non-stop work.  People showed up and worked hard.  I took deep breaths and trusted my skilled labor and leaned heavily on my deputies and a couple of other logistics helpers.  There were 6 ironing boards, 2 sergers, and 6 sewing machines in action, along with lots of people tracing designs and cutting pieces. The charts and checklists appear to be working.

  Progress after day 2

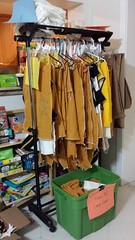
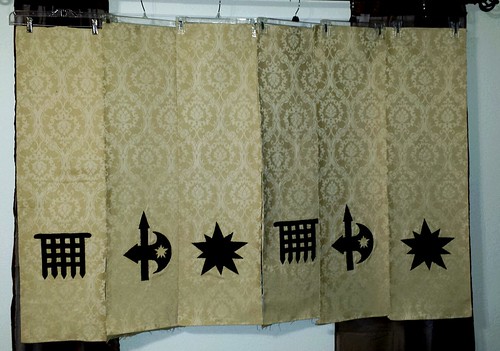
This is twenty surcoats in progress on a hanging rack. They are labeled and filed according to their position in the pipeline. It's like a cross between filing cabinet and a wardrobe. This sewing day turned into a weekend worth of baronial barn raising. We had two days of madness and accomplished a ridiculous amount of work.

  Queued pieces

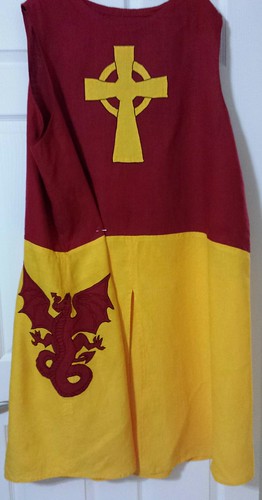
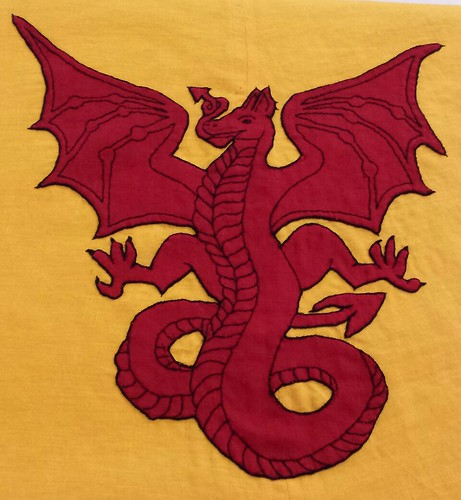
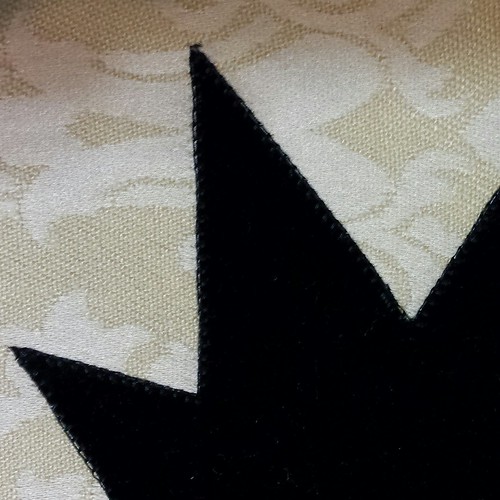
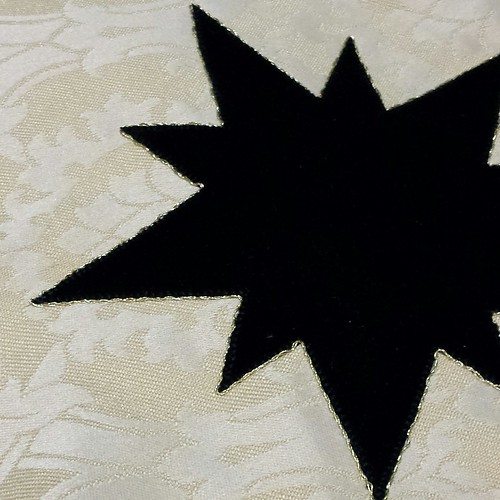
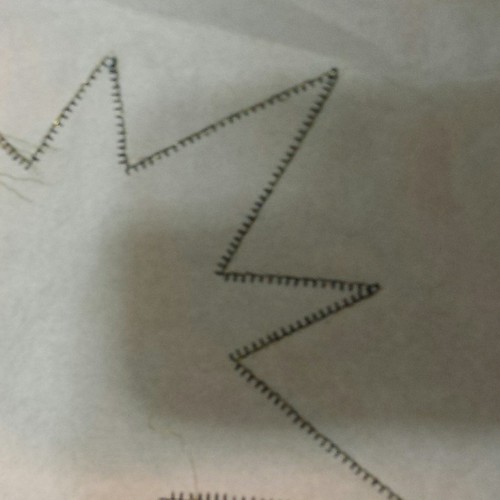
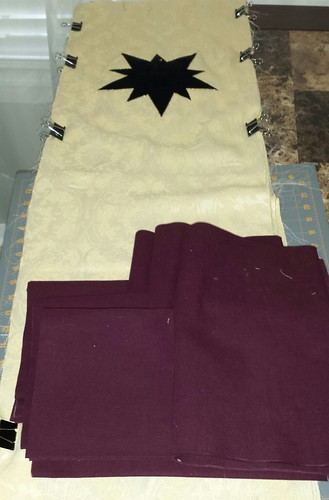
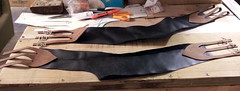
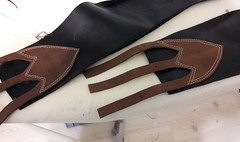
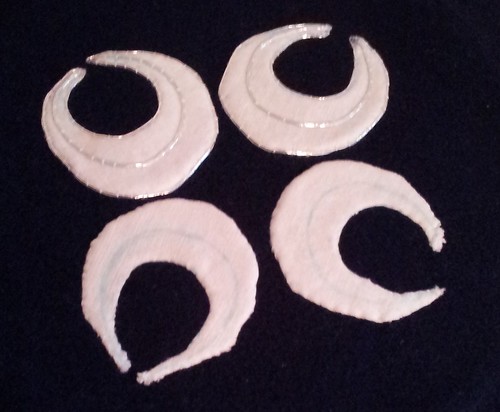
 The surcoats are all appliqued, so there are a lot of pieces. We have yellow halberds on black stripes that go on one side and black stars that go on the other side. The picture above is our piles of cut applique pieces in progress. These are all pieces that are waiting to go on surcoats next weekend.

Next weekend, we should have surcoats coming out the assembly line finished, so more pictures to come.  For now, my logistics team will spend the week trying to figure out how to most efficiently keep the line moving as we roll along.  Also, we will be appliqueing a lot of halberds.....

Sunday, January 11, 2015

Finished - Heraldic Surcoat

Finished surcoat!

The heraldic surcoat is finished, washed, ironed, and delivered!  Hooray!  The wyvern is placed on the hip, so I had to pin in a fold for it to show in the picture.  I didn't attend Crown Tournament this weekend, so I am hoping that friends got pictures of the surcoat in action.


Appliqué and embroidery is finished!

The wyvern was quite tedious, but a very gratifying project.  I've done a lot of machine applique and there is definitely a difference between the finished product of hand work and the machine work. The combination of applique and embroidery have a nice drape to them.  I'm always amazed at how lovely linen looks after it's all pressed out and hung up.  Yowza!

Tuesday, December 30, 2014

Heraldic surcoat

I have a little time off for the holidays and my fun project is a heraldic surcoat for a friend of mine. Here are a few teaser photos of the work in progress. The surcoat itself is machine sewn. The cross was appliqued with my sewing machine using a blanket stitch after I ironed down all the edges. The embroidery is by hand using a #12 pearl cotton. The wyvern is going to be all by hand, both applique and embroidery. The term "fiddly" doesn't even begin to describe the displayed wyvern.

Some applique and embroidery for a heraldic surcoat Wyvern appliqué

Tuesday, July 29, 2014

Populace banners

I've been on a banner kick lately and I had some left over brocade, so I decided that Giant Sparkly Banner needed some friends. The project was born and I am working on six populace banners - two each for Ansteorra (kingdom), Bryn Gwlad (Barony), and for Hellsgate (shire with Bryn Gwlad). These little banners have been moved around my house stacks several times in various states of completion, but finally I got a picture of all of them together. Last night I finished backing them all with canvas and now all I have left is gobs of hand sewing to roll the hems and close out the raw edges. Anyway, here they are, starting to look fairly spiffy! Stitching is finished and all the banners are backed.   Next is finishing hems and hangers.

Production on these was fairly simplified since I was aiming to actually finish them this year. I wanted a look that would complement Giant Sparkly Banner, but they aren't competition pieces, so bring on the sewing machine and quilter's hacks! The black is a sturdy cotton velvet with a very short pile. It's a very pretty velvet, but it's best feature is that a test swatch passed the ironing test - on high heat. That means I can do all sorts of fun things with it.

First, I fused a tear-away stabilizer to the back of the brocade. The brocade is pretty, but it would never hold up to the abuse I was about to heap out without some help. I cut out the and fused the velvet charges to the brocade using Heat-N-Bond. I wanted something that could pass for hand embroidery at a distance, so skipped the traditional fusible+satin stitch option. My machine has a nice blanket stitch option, so I used a narrow blanket stitch and stitched down the edges for each of the charges. Populace banners

Any banner that is going to sit next to Giant Sparkly Banner is going to need a little pizazz, so I dug out my left over gold twist. I couched the gold twist around all of the edges by hand, on top of the blanket stitch. The result is nice. The gold twist makes a nice contrast border for the velvet and adds some sparkle, while also covering up any stray machine stitching that wasn't exactly flush with the edge of the charges. Populace banners

I left the fused stabilizer on the back, which made the stitching for the couching quick work. I didn't need a hoop or frame, since my tension was perfect. The lightweight tear-away stabilizer didn't hamper my the needle work at all. Below you can see the back of the pieces with visible machine work in black and hand work in gold. Populace banners

Overall, this was a great approach to get maximum bang for my time. I started to feel like the project was dragging, but then realized that there were six of these things! After the embroidery was all finished, I ironed out the pieces, squared them off, and cut the canvas backing. This part was all classic quilter's skills, except I had a stack of brocade, which is less cooperative than quilter's cottons. Again, I found that you can never have too many binder clips and there is always a use for more. After taming the wild brocade and squaring things off I managed to actually hit my target of a width of 12 inches for the banners (although some of my hems will be very small). In another stunning development, when I finally hung them up, the charges are all lined up correctly. I kind of held my breath on that one, because no matter how much you plan and check and re-check you always fear that something weird would happen. Will one be out of vertical alignement? horizontal alignment? upside down? I kind of just stood there and stared for a bit when they turned out just fine. Hooray! Squaring off the brocade and cutting the canvas backing.

Monday, July 1, 2013

Finished horse tunic

finished horse tunic I finished the applique and other stitching on the horse tunic. My little guy was checking my progress regularly and is pleased with the result. This one is still a little big on him, so hopefully it should last more than one or two events before he out grows it!

Tuesday, June 25, 2013

Two horses

Two horses I've finished the applique and decorative stitching for both of the horses. After that I ironed them out to roundels. Next step is to applique them onto the tunic!

Wednesday, June 19, 2013

Horse applique number one

horse My little guy requested decorations for his new tunic. When I asked him what kind he decided that he wanted some horses on his tunic. I needed the tunic finished for the event, but then got to work on his decorations. He has been checking with me every day to see my progress. Last night I finished the first horse and he really likes it. Hooray! The horse is white linen appliqued to a black linen ground fabric, which matches the collar and sleeves on his tunic. I hand appliqued the horse using needle turn and a button hole stitch. After I finished I wanted to add a bit more to the outline, so I just did a quick outline of chain stitch.

Sunday, June 16, 2013

Kid's Tunic and Pouch

Tunic and pouch My little guy continues to grow rapidly, so it was time for new SCA clothes. He picked the linen out of my stash and I made him a new tunic. I decided that I was done making small collars with the sewing machine, so I did this one by hand. Sewing it in by hand is definitely easier for the tiny collars. I'm still working on my hand applique skills, but I do like the result. Little guy liked the tunic too and now I'm working on the decorations that he requested. Also, we had an SCA birthday party for this weekend, so I put together a felt pouch for the little girl. I added a bit of stitching and then appliqued a tiny heart. Cuteness achieved :)

Saturday, June 1, 2013

C-belt finished

C-belt is finished! A few modifications made it feel more secure and fit better. The neatsfoot oil has darkened the brown leather that was attached, and after a week or so the new leather will probably darken too. The color contrast is still enough for a pretty pattern though. Finished c-belt Here I am wearing it! Very comfortable and ready to hang some legs on. Front view of finished c-belt

Friday, May 17, 2013

New C-Belt

I've been pondering upgrading my armor for a while now and have a list of stuff I'd like to do. I've recently moved, which gave me the chance to inventory my collection of random craft stuff. This week I found enough leather bits to start putting some stuff together, so I decided to begin with a new c-belt. I've been working on design and planning with my randomly shaped scraps here and there most of the week. Here are the bits all nice and cut out. C-Belt progress The black leather is a lighter weight leather and the brown is a bit heavier weight. I had to oil the black leather since it had been in various garages for quite some time. I have an old school metal sewing machine, so I can drop it down to a very low speed and sew leather. I've got some nice leather needles which look like tiny daggers. At first the sewing was a bit rough, but I rubbed some of the leather oil on the needle and then things went quite nicely. Appliqueing leather is fairly different than the work I've done with fabric and it was challenging. I managed to make it through without any catastrophes. No do overs with leather! C-Belt progress Finally, I riveted in the buckles and finished them out. It's starting to look pretty nice. The screw rivets probably wouldn't have been my first choice for the project, but my theme for a while is going to be using stuff I already have and I had a handful of these left over. I am going to keep rummaging through things to see if I find some rivets I like better. C-Belt progress Next on my agenda will be adding the leg harness mounts over the hips. I'm going to continue to strategically use the brown leather to reinforce the black leather and hope that it is strong enough. I used some older measurements and I think that I'm going to have to take in the front a little. I'm going to let it sit overnight and think a bit on what to do next.

Monday, August 20, 2012

Starting an apron dress

dress I've started work on an viking apron dress! I finished sewing it last week and had some time this weekend to get started on the embellishments. The sewing went well and all more gores are pretty and lay flat, so I was very pleased. It seems that completing a dress is only the first step, since there is lots of decoration to do. I started work on the embroidery, since that should go fairly quickly.

I follow a lot of blogs of people I don't know who do nifty things, and I have been particularly inspired by Ari's embroidery. I have a box of worn out silk shirts that I use for scrap on projects and wanted to use it for applique. I didn't want to use wonder under for the applique though, since it would make the silk too stiff and weird. So I took a leap of faith and tried Ari's techniques. I think most of her stuff is wool, so I may regret using fiddly silk, but hey - it's "free" stash fabric, so I may as well give it a try.

First step is getting the fabrics sewn together and the pattern transferred. I traced the pattern on some tissue paper and then put the dress + silk + tissue paper in an embroidery hoop on the sewing machine. The hoop kept the silk from slinking around and gave me some maneuvering control. Spirals on a completed dress on a straight stitch is probably the path to madness, so I've got an embroidery/quilter's foot on the machine to do the work free hand. Below is a picture of the set up. It worked pretty well and my only complaint was that the hoop should have been a bit bigger for better maneuvering (but there's a trade off for fabric tension with that slinky silk). My 4-year old was fascinated by the process, so I got some "helping", which resulted in some wiggly lines, but that is fixed later. machine Here is the result off the machine. Silk is sewn down and pattern sewn in. Don't worry, it gets prettier with more stuff on it. work1 Trimmed away the excess fabric and loaded it up into a hoop. Now we are ready for embroidery time! work2 My first concern was anchoring down the edges before the silk totally shredded and getting the edge decoration done. I really liked Ari's anchored chain stitch approach for strength + decoration, so I gave it a shot. It took a few stitches to get the rhythm right, but I like the way it turned out and it seems to be holding up. In my zeal to anchor the silk firmly, I think that I used stitches that were just too small for the anchored stitched. I probably should have made them twice as long, but I was so worried about a strong anchor, shredding silk, and edge coverage that I was perhaps a bit too enthusiastic. There are a few little silk shreds poking through, but not as bad as I had worried. Of course the whole silk background may disintegrate after washing, but I will still have some nice surface embroidery, and that's how experiments go. outline Next is filling in some of the pattern. I worked the spirals in stem stitch and the inner circle in chain stitch. I'm still working on my stem stitch technique, but it is improving and I think that it will hold up. As I'm stitching, I am also pulling out any stray wiggles from the sewing machine thread. This keeps things looking tidy and keeps too much fuzz. work3 So far, I really like it. The embroidery over silk lends an almost quilted quality that gives it some depth and shine. It's actually nicer than I expected. Next up is the gray fill for the outer and inner circle designs.

Monday, July 16, 2012

Largesse for Pennsic Finished!

Ta-da! Finished! progress5 There are more progress pics on my Flickr stream, but since I was too lazy to blog them in progress - I will spare you. I put the penny on top for scale, since it's a fairly large pouch. Final materials list:
  • wool - gray pouch, blue roundel
  • white linen - white crescents and pouch lining
  • Kreinik Jap 5 silver thread for couching and tassel tops
  • Gutterman silk white sewing thread
  • a lace weight white wool yarn for drawstring and tassels

Monday, July 9, 2012

Largesse for Penssic

I thought I'd post some of the progress pics on the little project I'm doing for our gift basket at Pennsic. I've been meaning to try some needle-turn applique, so this is my test project. The background is some blue wool I picked up at Gulf Wars and the crescents are a nice dense weave linen. I used the linen both as the applique and the foundation, since I didn't have any thin white wool. Below is a progress pic of the applique. progress-b The linen foundation gave more loft than I thought it would, so the crescents have a nice depth. After the applique was finished, I started with the outlining. progress-a The outlining is done in Kreinik Jap 5, couched with silk thread. I like the way they are turning out, though the applique acquired some skew. I starched the foundation linen, but alas, it was a crescent with lots of bias edges, so skew was probably inevitable no matter how well I tacked it down before the applique - lesson learned. The outlining smooths things out quite a bit and adds some forgiveness to the process. The camera doesn't really capture the wool / linen / silver contrast very well, but I am pleased with the look. More progress soon, since I'm on a deadline.