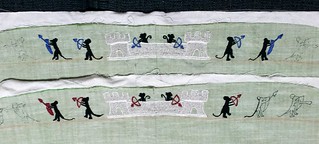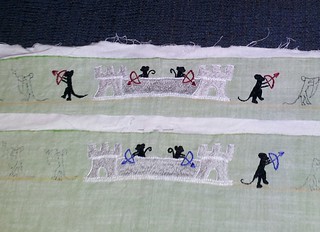
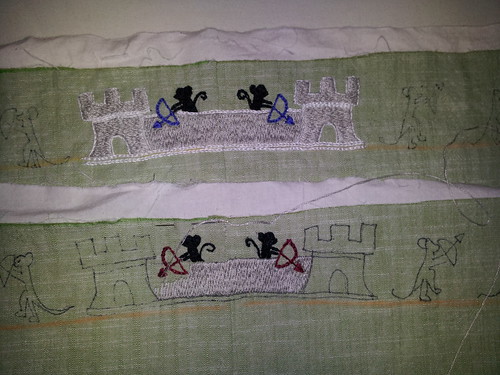
 I've transferred the pattern and made a good start on the stitching. The blue mice have their castle and the red mousies are soon to follow. I'm liking how the design is stitching up. I went with DMC cotton floss for this one, since it's for kids and silk seemed a bit overboard. Ok, silk seemed like a fabulous idea, but one of my friends called "reality check" on me and was correct. The cotton is looking good, so I am happy.
Now that the project planning is done and I've actually started, I wanted to give a shout out to the awesome blog "Got Medieval" which inspired the design for this project. I was looking around for a cute little pastoral scene for a kid's project and remembered the epic mouse versus cat marginalia battle. I've wanted to do something fun with it for a while, so I seized the opportunity. I didn't have enough stitching space to do the poor, defeated kitties artistic justice, but that may just be another chapter in their sad tale. Here is the thread of the tale of the cats versus mice.
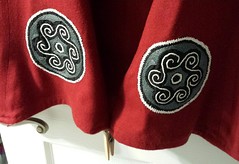
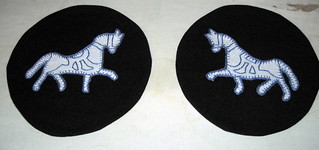 I've finished the applique and decorative stitching for both of the horses. After that I ironed them out to roundels. Next step is to applique them onto the tunic!
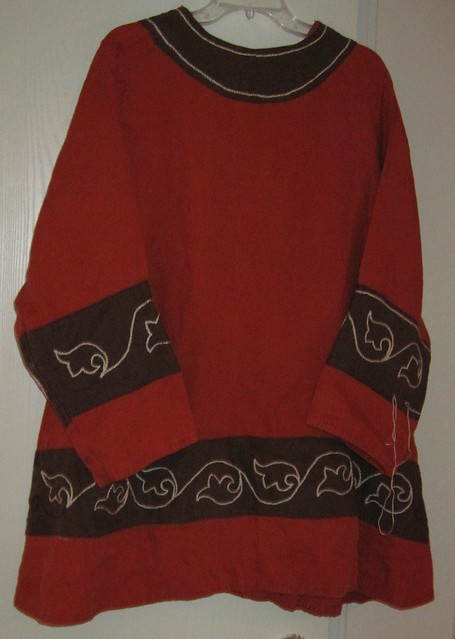
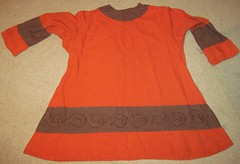
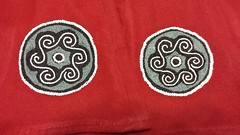
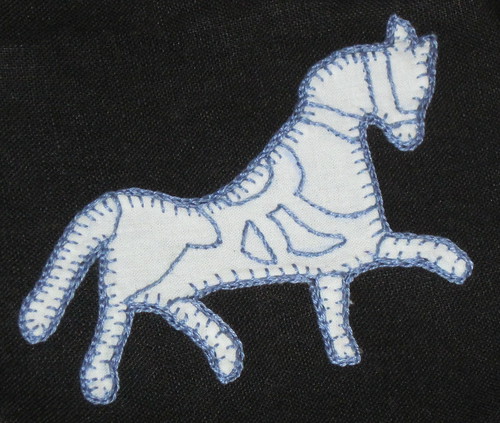 My little guy requested decorations for his new tunic. When I asked him what kind he decided that he wanted some horses on his tunic. I needed the tunic finished for the event, but then got to work on his decorations. He has been checking with me every day to see my progress. Last night I finished the first horse and he really likes it. Hooray!
The horse is white linen appliqued to a black linen ground fabric, which matches the collar and sleeves on his tunic. I hand appliqued the horse using needle turn and a button hole stitch. After I finished I wanted to add a bit more to the outline, so I just did a quick outline of chain stitch.
My little guy requested decorations for his new tunic. When I asked him what kind he decided that he wanted some horses on his tunic. I needed the tunic finished for the event, but then got to work on his decorations. He has been checking with me every day to see my progress. Last night I finished the first horse and he really likes it. Hooray!
The horse is white linen appliqued to a black linen ground fabric, which matches the collar and sleeves on his tunic. I hand appliqued the horse using needle turn and a button hole stitch. After I finished I wanted to add a bit more to the outline, so I just did a quick outline of chain stitch.
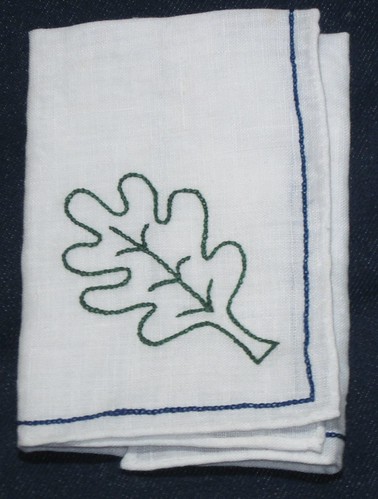
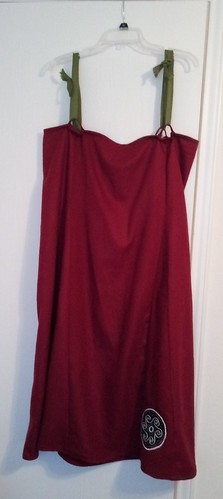 I've started work on an viking apron dress! I finished sewing it last week and had some time this weekend to get started on the embellishments. The sewing went well and all more gores are pretty and lay flat, so I was very pleased. It seems that completing a dress is only the first step, since there is lots of decoration to do. I started work on the embroidery, since that should go fairly quickly.
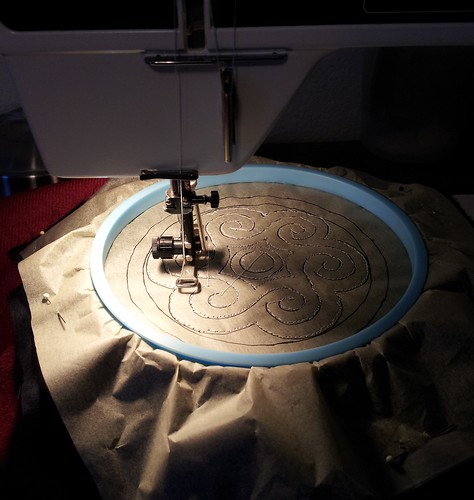 Here is the result off the machine. Silk is sewn down and pattern sewn in. Don't worry, it gets prettier with more stuff on it.
 Trimmed away the excess fabric and loaded it up into a hoop. Now we are ready for embroidery time!
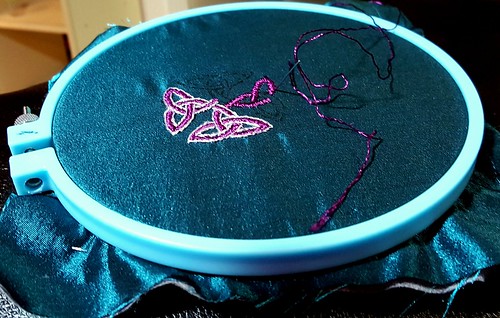
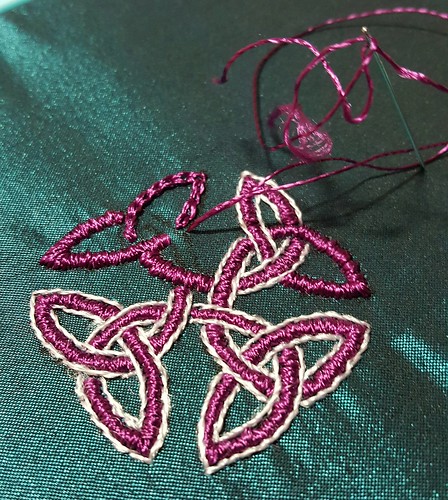
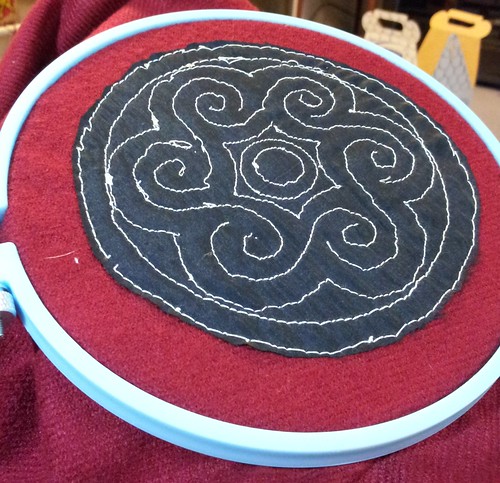 My first concern was anchoring down the edges before the silk totally shredded and getting the edge decoration done. I really liked Ari's anchored chain stitch approach for strength + decoration, so I gave it a shot. It took a few stitches to get the rhythm right, but I like the way it turned out and it seems to be holding up. In my zeal to anchor the silk firmly, I think that I used stitches that were just too small for the anchored stitched. I probably should have made them twice as long, but I was so worried about a strong anchor, shredding silk, and edge coverage that I was perhaps a bit too enthusiastic. There are a few little silk shreds poking through, but not as bad as I had worried. Of course the whole silk background may disintegrate after washing, but I will still have some nice surface embroidery, and that's how experiments go.
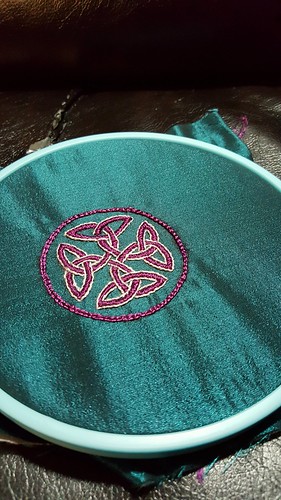
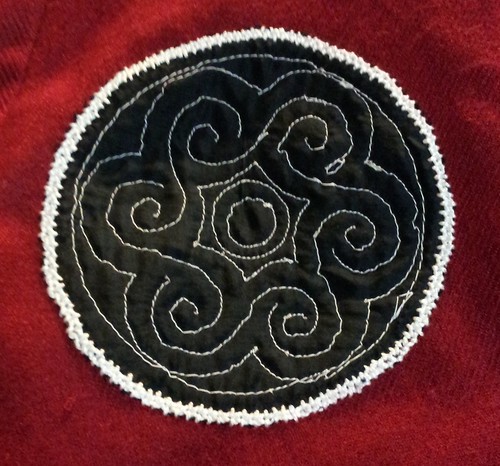 Next is filling in some of the pattern. I worked the spirals in stem stitch and the inner circle in chain stitch. I'm still working on my stem stitch technique, but it is improving and I think that it will hold up. As I'm stitching, I am also pulling out any stray wiggles from the sewing machine thread. This keeps things looking tidy and keeps too much fuzz.
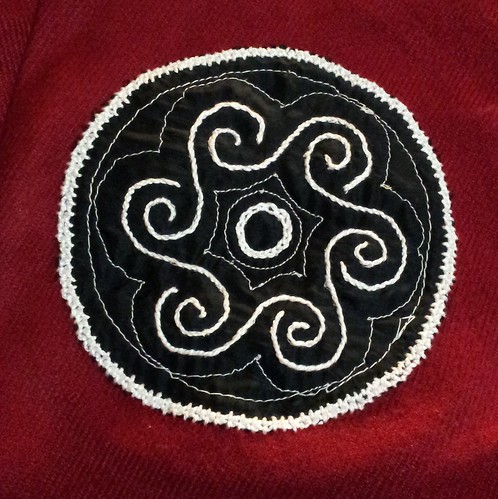 So far, I really like it. The embroidery over silk lends an almost quilted quality that gives it some depth and shine. It's actually nicer than I expected. Next up is the gray fill for the outer and inner circle designs.
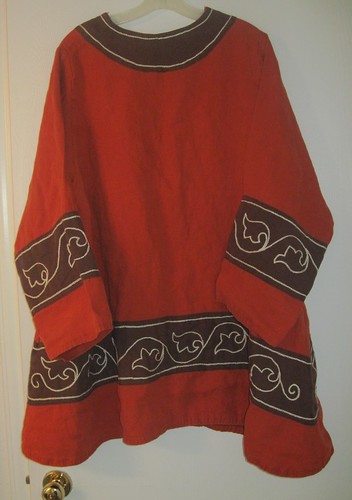
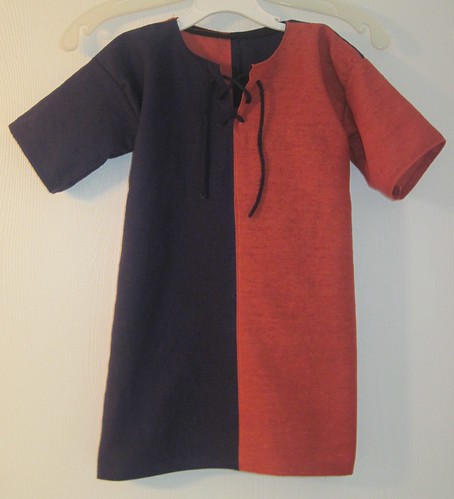
Today I also have a Bonus Tunic! That's right - two tunics for the price of one post! My 2 1/2 year old son came with me to Kingdom Arts and Sciences and so I made him his own little tunic. Its about a size 4T, so its pretty small. My verdict on children's clothes is that they usually go faster and are a bit easier to sew, until you get to the neck and arms, which are tiny! I had to poke the eyelets in with an awl while I was in a hurry for the lacing to work, so I will try to stitch those up nicely before he wears it again. I meant to get a picture of him in it in action, but I totally forgot! Perhaps next time :)