Showing posts with label rivets. Show all posts

Tuesday, October 20, 2015

Strapping new arms

IMG_0561
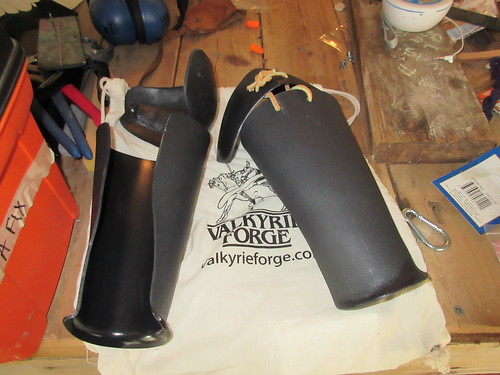
At Gulf Wars I picked up some new lightweight plastic arms.  I needed to strap them, so I thought that I would share with you how I got it done.

IMG_0562
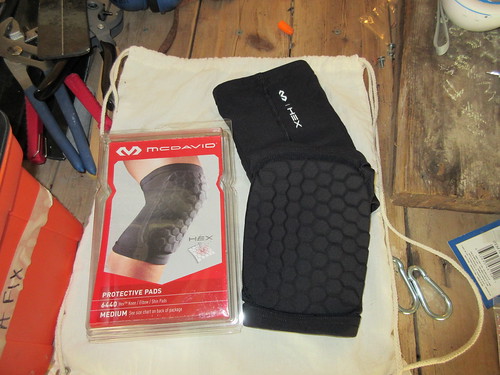
First, here is what I am putting under my elbows.  The sleeve is fairly tight and I am using it to keep my arms in place.  The elbows are tied directly to the sleeve.

IMG_0564
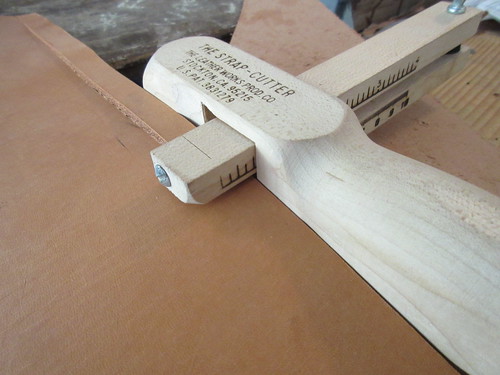
Here is my trusty strap cutter and the giant chunk of leather that hangs out in my work area.  I've got the cutter set to the correct width for my buckles.  I'm cutting four straps - two for each arm.

IMG_0566
Here are some freshly cut straps and buckles.  It's a start.

IMG_0568
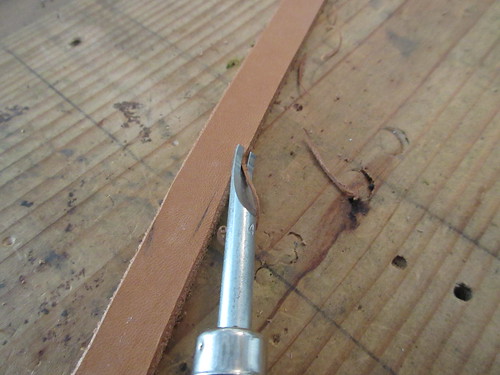
I'm fussy about raw edges on leather, so here I am beveling the edges to smooth things out.

IMG_0570
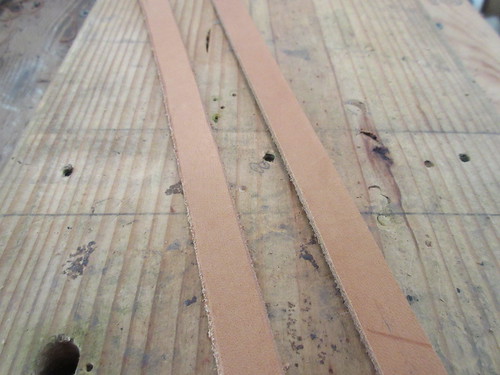
Compare the beveled edge on the left to the raw edge on the right.

IMG_0576
The left strap has been beveled, smoothed, and waxed.  Now you can really see the difference between the nice strap and the raw edges.

IMG_0577
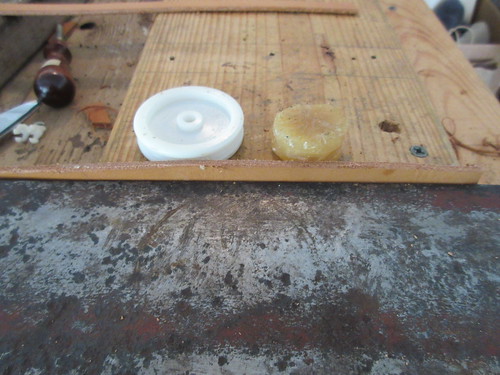
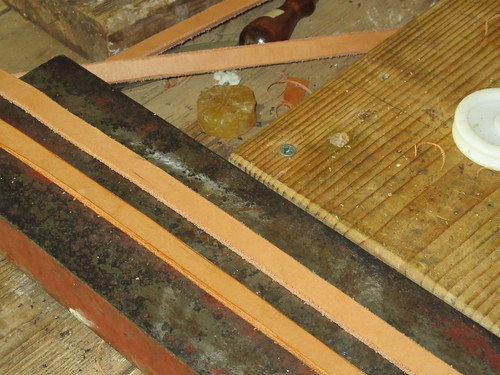
Here are my trusty tools: edge slicker and beeswax.  I used my anvil to hold the strap in place while I worked the edges.

IMG_0580
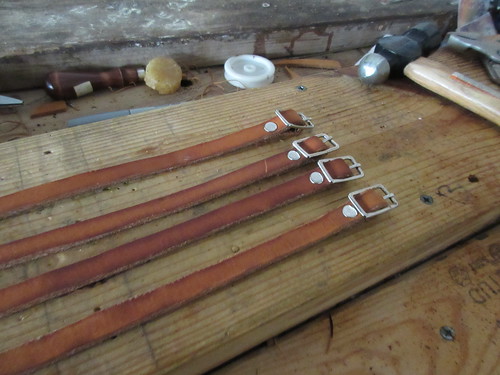
After I finished the edge work, I oiled the straps with some neatfoot oil.  The oil will protect and condition the leather.  As an added bonus the oiled leather looks nicer.  I've also riveted in my buckles on one end.

IMG_0581
I drilled holes for the initial placement of the straps.  First strap has its first rivet.

IMG_0582
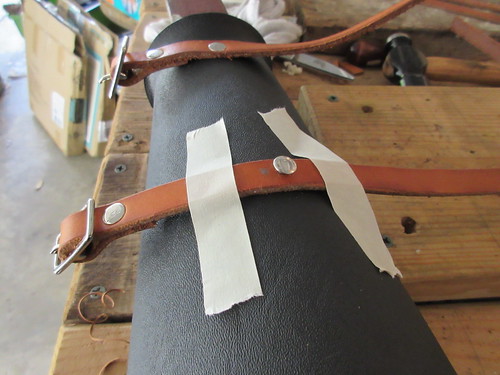
How do you keep things still for the hammering?  Tape!

IMG_0583
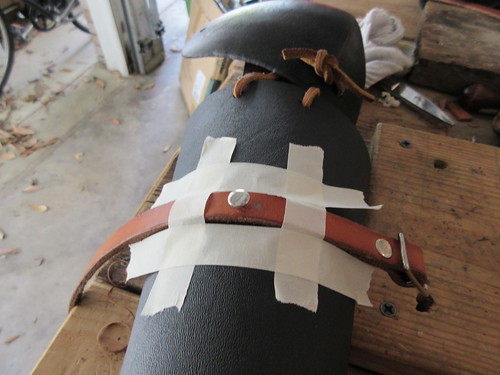
Needs more tape!  I don't want the strap wiggling on impact.

IMG_0584
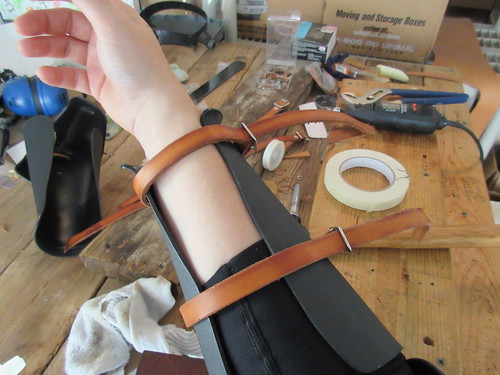
The straps are riveted in and ready to punch buckle holes.

IMG_0585
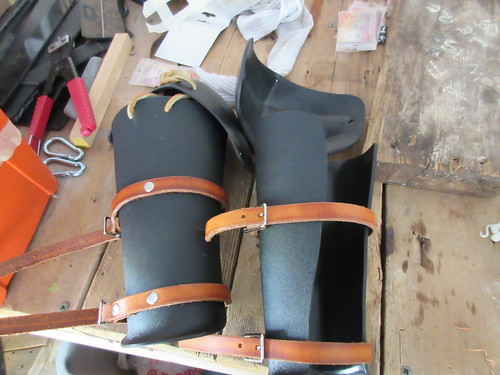
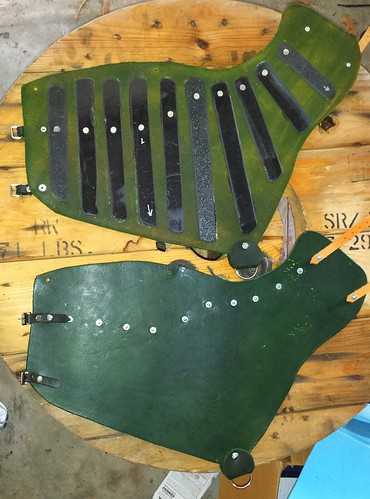
All the holes are punched and the longer edges are trimmed off.  All done!

IMG_0595
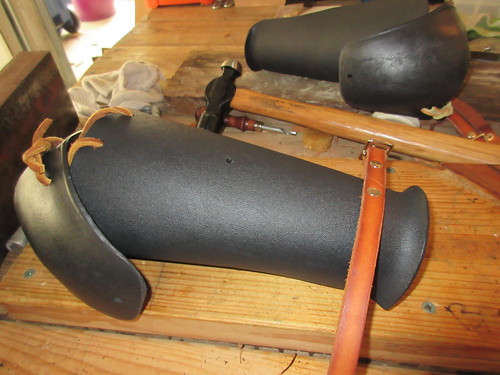
Here are the arms with my gear.  The yellow is some wool felt for extra padding.  The purple lucet cords tie the elbows to the arms and point the elbows to the sleeve we saw in the second picture.

IMG_0596
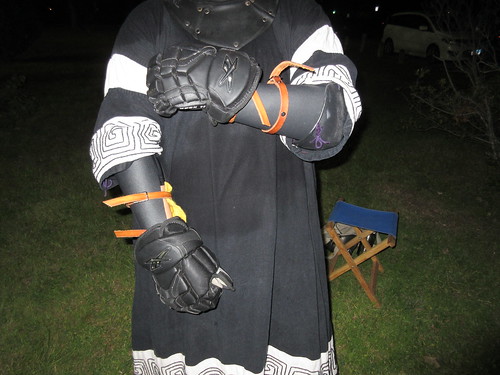
Gloves on and we are ready to go!

Monday, July 28, 2014

Actual rivets

Pretty rivets were a fail. After a few tests, they just didn't hold up to abuse. I decided to quit looking for something prettier and go with the tried and true combination of roofing nails and washers in order to get the job done. Sir Maelgwyn taught me this approach when we were working on my coat of plates and now I share it with you, my dear readers, in the picture below. Riveting the splints in: right to left 1. Plain roofing nail 2. Clip nail short 3. Add washer 4. Nail hammered and shaped

The sequence is from right to left for no reason other than that is the angle that I took the picture.

  1. First make a hole an pop the nail through.
  2. Slide the washer over the nail. The tighter the fit on the washer, the less rattling around and jumping you get. This washer is probably too loose, but it's what I had on hand.
  3. Clip the nail fairly close to the washer. You don't want it flush, since you need some metal to spread out for the rivet. I've got some handy metal shears for this that work well and help you develop your forearm strength.
  4. Hammer down the nail into a nice rivet. You can use the flat part of the hammer to spread the metal and the rounded part to shape it into a nice even dome.
And finally, here is progress on the legs. Progress

Wednesday, June 4, 2014

Riveting news!

Test of decorative rivets

I've been looking for some pretty rivets since the planning stages of my armor upgrades.  I want something pretty, but don't have the budget for the super nice historical replicas.   These are my favorite thus far.  They are cheap and if you squint really hard, they look kind of rose or flower-ish.   The metal is a decent thickness, so they should hold up ok.  I think that they will look fairly nice.  I am almost at the riveting, so unless I find a better option before I finish drilling holes, these are it!