Tuesday, September 9, 2014

Brick stitch pouch

stitch sample

Sometimes I post pictures to my Flickr feed with all intents to write about them - and then forget. Such is the fate of the brick stitch pouch that I am currently working on, so we will take a quick trip back in time. This project started out as a quick doodle to test out some new fibers that I picked up at the local embroidery store. Having recently played around with some filament silk, I was looking for something that was a cheaper approximation of that pretty high shine and that soft hand. DMC has recently changed their rayon line again, so I pick up some DMC red and green. The Reaissance Designs "Silky" threads were another synthetic option that was just so shiny and soft that I had to get a couple of skeins in blue and yellow.
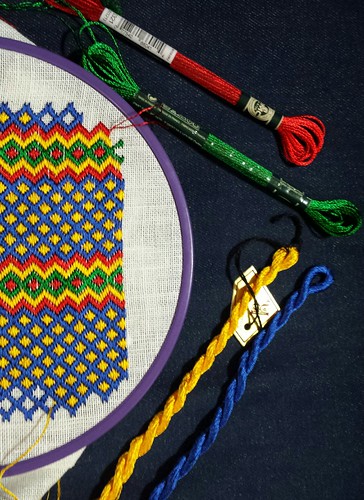
stitching threads

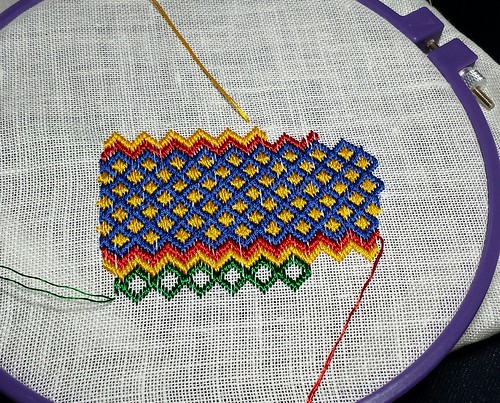
I started stitching this little doodle using an impromptu brick stitch pattern and was really having fun with it. It just kept getting bigger!

The DMC rayon is in a very familiar skein, that are individually wrapped in a plastic tube. The rayon is very slippery and easily separates into six strands. Each strand barely has any twist at all and reminds me in feel and look of flat silks. I used two strands for the stitching on the 28 count linen, but I think that next time I would use three. The fibers are finicky like silk, so got find your hand lotion and check your cuticles. I love the feel of stitching with this rayon and really, really love it bright shine. I do not like the feeling of starting, finishing, or tying off knots with this thread because it fights back and seems to leave you with the feeling that the second you turn your back it's going to spring out of place. After finishing the stitching however, the piece feels very solid and I don't have anything wiggling out the back. The threads do snag, so you have to be careful with your hands and environment. They can also tire easily, so shorter lengths are better or you get fuzzy parts. Overall, the red and green are beautiful and shiny and soft, and I think they are a good option for that silky look.

The Renaissance Designs "Silky" comes in a lovely twisted skein and also separates out into smaller threads. These threads seem more solid than the DMC threads and were much less likely to fuzz or snag. They had the same springiness that made starting, finishing, and tying threads a bit unnerving. Two strands of the blue and yellow provided really good coverage on the linen, but they seem to have more texture and less shine. Some of the texture comes from the threads having a bit of a twist, so if you are looking for that twist this thread is a good option.
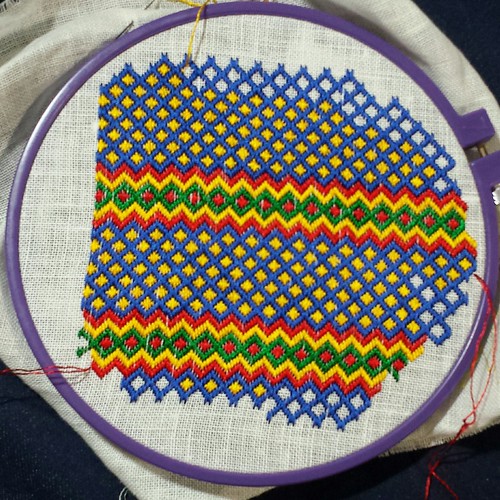
stitching progress

At this point, it was clearly a "Project that Must be Finished" and so I had to figure out what it was going to be. (to be continued)

Tuesday, September 2, 2014

Generally busy

I'm juggling a number of projects with a variety of goals and the last couple of weeks have been a bit of progress on everything.

IMG_0812

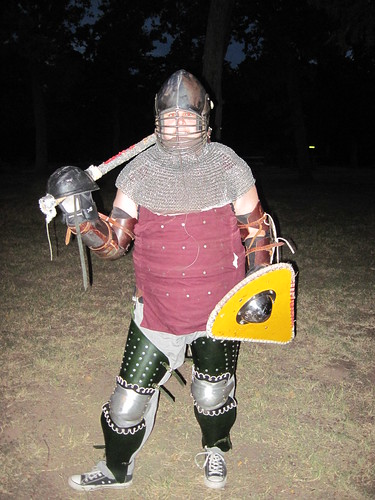
Here I am modeling the latest in my armor. My leg armor is coming along and is in a wearable state, although it still needs more work to be truly finished. I also have a new helm from Master Max and a new aventail that Sir Ysfael hung for me. After a long hiatus, I am finally back in the fight.

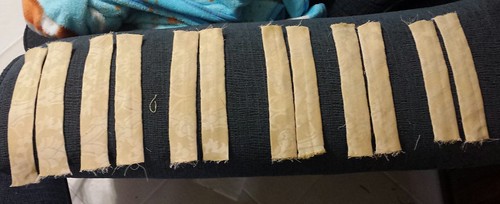
Six pair of hanger loops starched and ready to sew onto the populace banners

Here are six pairs of little hanger loops ready for the assembly line as I attempt to finish up the populace banners.

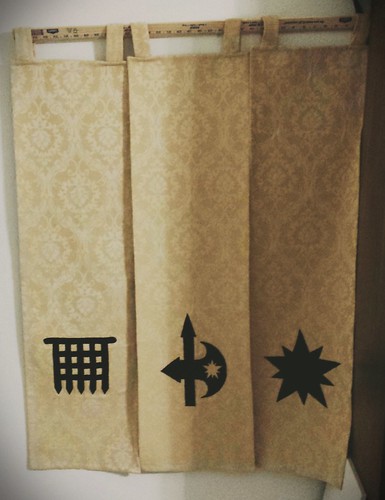
Populace banners with attached hanging loops!

Three banners finished stitching with hanger loops attached! I'm currently finishing up the last one and then I will have two full sets of three. Next I need to come up with a hanging pole arrangement that is slightly nicer than the yardstick I had hanging around the sewing area.

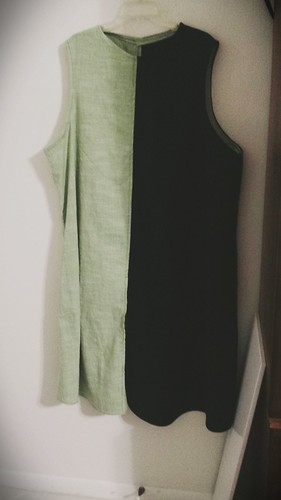
Surcoat for fighting

I knocked out a quick linen fighting surcoat for a friend. It's another project in my continued theme of reducing the fabric stash.

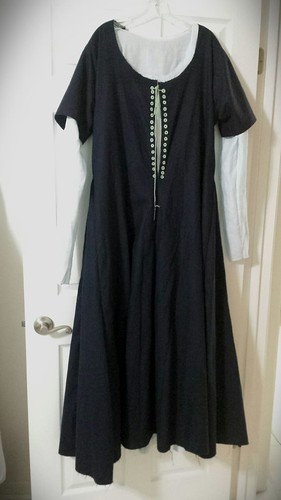
Preview of latest outfit.  It still needs some more sewing.

And last, but not least, I have a preview of my next outfit. The dress and under dress are assembled but still need finishing on the neckline and hem. It's kind of hard to see in the picture, but the dress is dark blue, the under dress is light blue, and the eyelets+lacing are in light green.

Friday, August 15, 2014

Hemming Populace Banners

Stitching in the canvas backing on the populace banners

I've been busy, but there's not lots of pretty pictures for hemming six banners. I snip, clean off threads, roll the brocade, stitch, and repeat. I am currently hemming banner number five, so there is an end in sight. Well, an end to hemming anyway. I will still need to cut and sew the loops to for the banners to hang from. I've also begun plotting banner stands, so that I can display them. Progress!

Tuesday, July 29, 2014

Populace banners

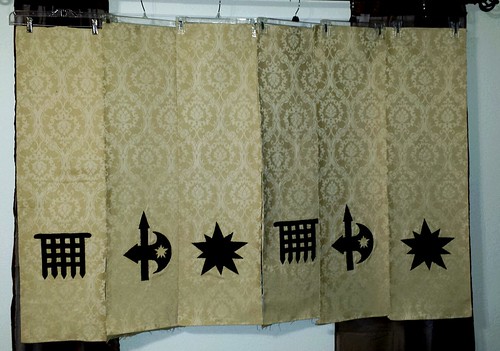
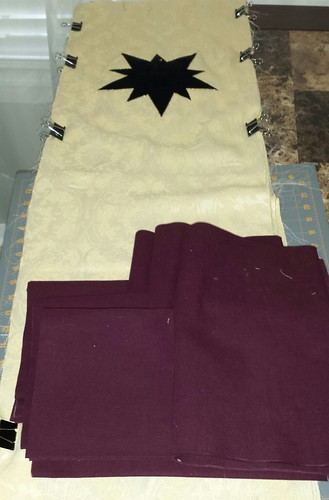
I've been on a banner kick lately and I had some left over brocade, so I decided that Giant Sparkly Banner needed some friends. The project was born and I am working on six populace banners - two each for Ansteorra (kingdom), Bryn Gwlad (Barony), and for Hellsgate (shire with Bryn Gwlad). These little banners have been moved around my house stacks several times in various states of completion, but finally I got a picture of all of them together. Last night I finished backing them all with canvas and now all I have left is gobs of hand sewing to roll the hems and close out the raw edges. Anyway, here they are, starting to look fairly spiffy! Stitching is finished and all the banners are backed.   Next is finishing hems and hangers.

Production on these was fairly simplified since I was aiming to actually finish them this year. I wanted a look that would complement Giant Sparkly Banner, but they aren't competition pieces, so bring on the sewing machine and quilter's hacks! The black is a sturdy cotton velvet with a very short pile. It's a very pretty velvet, but it's best feature is that a test swatch passed the ironing test - on high heat. That means I can do all sorts of fun things with it.

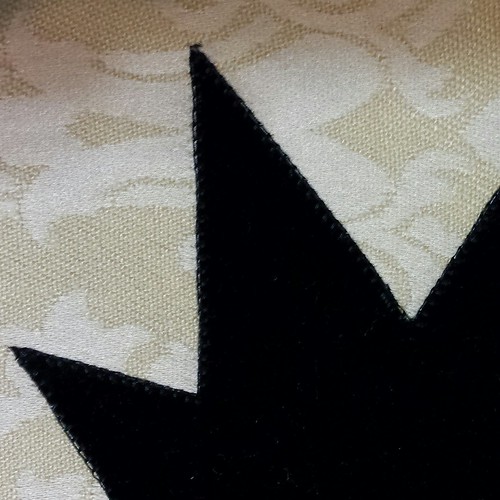
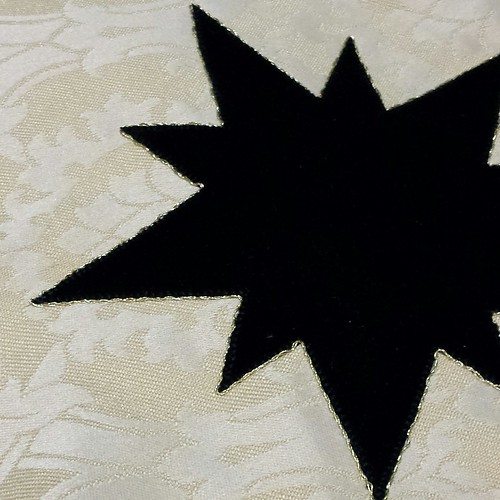
First, I fused a tear-away stabilizer to the back of the brocade. The brocade is pretty, but it would never hold up to the abuse I was about to heap out without some help. I cut out the and fused the velvet charges to the brocade using Heat-N-Bond. I wanted something that could pass for hand embroidery at a distance, so skipped the traditional fusible+satin stitch option. My machine has a nice blanket stitch option, so I used a narrow blanket stitch and stitched down the edges for each of the charges. Populace banners

Any banner that is going to sit next to Giant Sparkly Banner is going to need a little pizazz, so I dug out my left over gold twist. I couched the gold twist around all of the edges by hand, on top of the blanket stitch. The result is nice. The gold twist makes a nice contrast border for the velvet and adds some sparkle, while also covering up any stray machine stitching that wasn't exactly flush with the edge of the charges. Populace banners

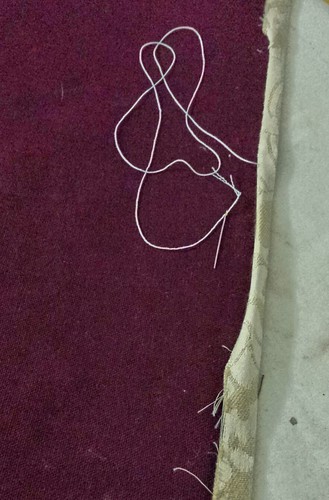
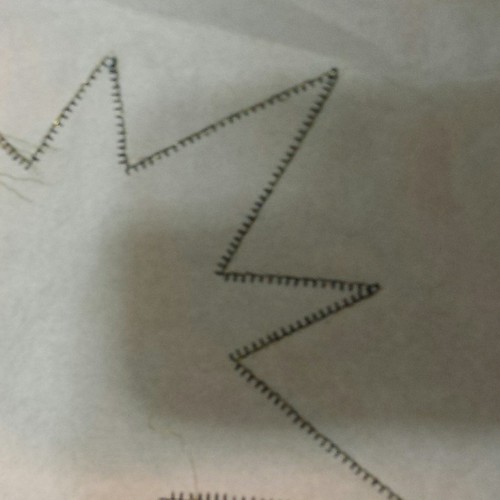
I left the fused stabilizer on the back, which made the stitching for the couching quick work. I didn't need a hoop or frame, since my tension was perfect. The lightweight tear-away stabilizer didn't hamper my the needle work at all. Below you can see the back of the pieces with visible machine work in black and hand work in gold. Populace banners

Overall, this was a great approach to get maximum bang for my time. I started to feel like the project was dragging, but then realized that there were six of these things! After the embroidery was all finished, I ironed out the pieces, squared them off, and cut the canvas backing. This part was all classic quilter's skills, except I had a stack of brocade, which is less cooperative than quilter's cottons. Again, I found that you can never have too many binder clips and there is always a use for more. After taming the wild brocade and squaring things off I managed to actually hit my target of a width of 12 inches for the banners (although some of my hems will be very small). In another stunning development, when I finally hung them up, the charges are all lined up correctly. I kind of held my breath on that one, because no matter how much you plan and check and re-check you always fear that something weird would happen. Will one be out of vertical alignement? horizontal alignment? upside down? I kind of just stood there and stared for a bit when they turned out just fine. Hooray! Squaring off the brocade and cutting the canvas backing.

Monday, July 28, 2014

Actual rivets

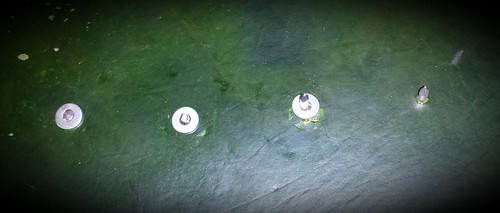
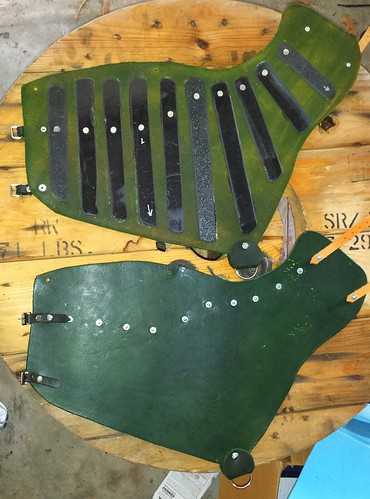
Pretty rivets were a fail. After a few tests, they just didn't hold up to abuse. I decided to quit looking for something prettier and go with the tried and true combination of roofing nails and washers in order to get the job done. Sir Maelgwyn taught me this approach when we were working on my coat of plates and now I share it with you, my dear readers, in the picture below. Riveting the splints in: right to left 1. Plain roofing nail 2. Clip nail short 3. Add washer 4. Nail hammered and shaped

The sequence is from right to left for no reason other than that is the angle that I took the picture.

  1. First make a hole an pop the nail through.
  2. Slide the washer over the nail. The tighter the fit on the washer, the less rattling around and jumping you get. This washer is probably too loose, but it's what I had on hand.
  3. Clip the nail fairly close to the washer. You don't want it flush, since you need some metal to spread out for the rivet. I've got some handy metal shears for this that work well and help you develop your forearm strength.
  4. Hammer down the nail into a nice rivet. You can use the flat part of the hammer to spread the metal and the rounded part to shape it into a nice even dome.
And finally, here is progress on the legs. Progress

Wednesday, June 4, 2014

Riveting news!

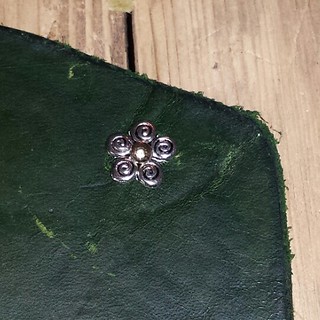
Test of decorative rivets

I've been looking for some pretty rivets since the planning stages of my armor upgrades.  I want something pretty, but don't have the budget for the super nice historical replicas.   These are my favorite thus far.  They are cheap and if you squint really hard, they look kind of rose or flower-ish.   The metal is a decent thickness, so they should hold up ok.  I think that they will look fairly nice.  I am almost at the riveting, so unless I find a better option before I finish drilling holes, these are it!

Thursday, May 29, 2014

Pouncing Armor!

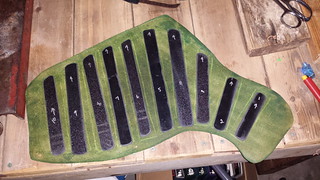
Lining up the splints on my leg armor.   They have now been sized and ground smooth

When we last left my leg armor, I was getting the splints together.  After cutting them out on the Beverly shears, I handed them off to Master Jovian.  He was kind enough to grind the edges smooth for me.  Above you can see the now not-jagged splints ready to go.

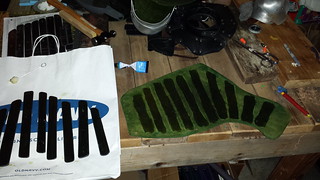
Contact cement to hold things together while I do the riveting

I hate getting rivet holes to line up and dealing with plastic and leather shifting about, so I have decided to eliminate the problem with copius amounts of contact cement.  The contact cement probably wouldn't survive fighter practice, but it will hold things together long enough for me to drill and rivet with minimal fuss.  Here is my sticky, gooey progress.

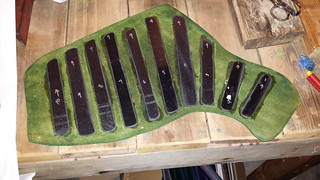
All glued together!

Once the contact cement cured, I placed all the splints in their proper position.  This felt a bit like a surgical procedure, since one false move and the plate is stuck forever.  Well, probably not forever, but there is no wiggle room with dropping the plates.  Contact cement does it's job well and the one splint that I tried to re-position would not budge even the slightest.

Some of my projects have extensive plans that go into great details.  Many have "the magic happens here" steps that lead to creativity, innovation, and occasionally weeping.  For some reason, my magic step here was "do the other leg".  Since I had done all the plate positioning directly on the first leg I didn't really have a pattern to work with.  What to do?  The answer was prick and pounce - armor style!

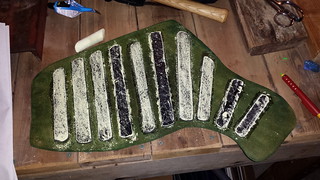
Sidewalk chalk for copying pattern

I borrowed my son's sidewalk chalk and used it to make maximum mess on the splint plates.  The plates with the texture side up did a much better job of being chalky, but the smooth plates did adequate.  When all the splints were thoroughly dusted, I carefully lined up the two pieces, flipped them over, pressed down carefully (no shifting!), and then removed the chalked piece.

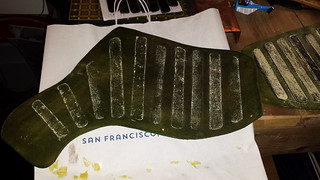
Copying success!

The result was a magnificent success!  I was hoping for it to work well enough for a fiddly approximation, but the copy was perfect!  After the surprisingly effective pattern transfer gluing the second leg was a breeze.